Your Guide to run Devnet Node on Powerloom Protocol

Powerloom Protocol is a composable data network primarily designed to meet the growing data requirements of smart contract-based applications, including DeFi, games, and other user-centric platforms. It incentivizes the generation of rich information and actionable insights on raw blockchain data
Imagine,
What if users can monetize their own data?
What if the developers' data is validated and verified by a data network?
Powerloom protocol offers decentralized onchain data markets allowing you to validate transactions, secure the network, and even earn rewards for your contributions.
In this blog, readers will learn how to set up their own node and build applications on Powerloom Protocol. This ensures you use a secure, decentralized, and incredibly powerful foundation. Imagine creating apps that can change how we share information, interact online, and even play games, all with the security and freedom Powerloom offers.
Who knows? The next digital breakthrough could come from you. So, let's get started. All you need is a laptop and internet access.
What is Powerloom Protocol?
Powerloom Protocol is a composable data network for Web3, ensuring the reliability of every requested data point through consensus-backed data points anchored by cryptographic proofs. This allows you to utilize flexible data markets and start building confidently. It is live on the Ethereum Mainnet and Sepolia Testnet.
You can run your own node on Powerloom and create a data-rich application on top of it. However, to begin, we must set up a Snapshotter node. A Snapshotter Node can capture custom data specifically curated to your needs.
Environment Requirements
Running a node on Powerloom Protocol is smooth if you know the system requirements, but there are not many. Check it out below :
RAM: At least 4 GB.
CPU Core: Minimum of 2 Cores
Disk Space: A minimum of 40 GB.
Python: Ensure Python 3.11 is installed.
Docker: Latest version of docker (>= 20.10.21) and docker-compose (>= v2.13.0). If your system doesn't have docker installed, you can follow this link.
1. Setup Burner Wallet
Burner Wallet is a simple, disposable wallet designed for quick, temporary transactions. It is important to note that the wallet you will use in this blog should not have anything valuable in it. Feel free to create a new wallet and use it to run a Snapshotter node. We will create a new wallet with Metamask as it supports the Ethereum blockchain and all its tokens.
Download Metamask
- You can create a new burner wallet through Metamask.
- Go to the above URL, Download the extension, and add it to your browser.
- Add a new account by clicking on the current account on the header.
- Select “Add a new Account” give it an appropriate name and click “Create”:
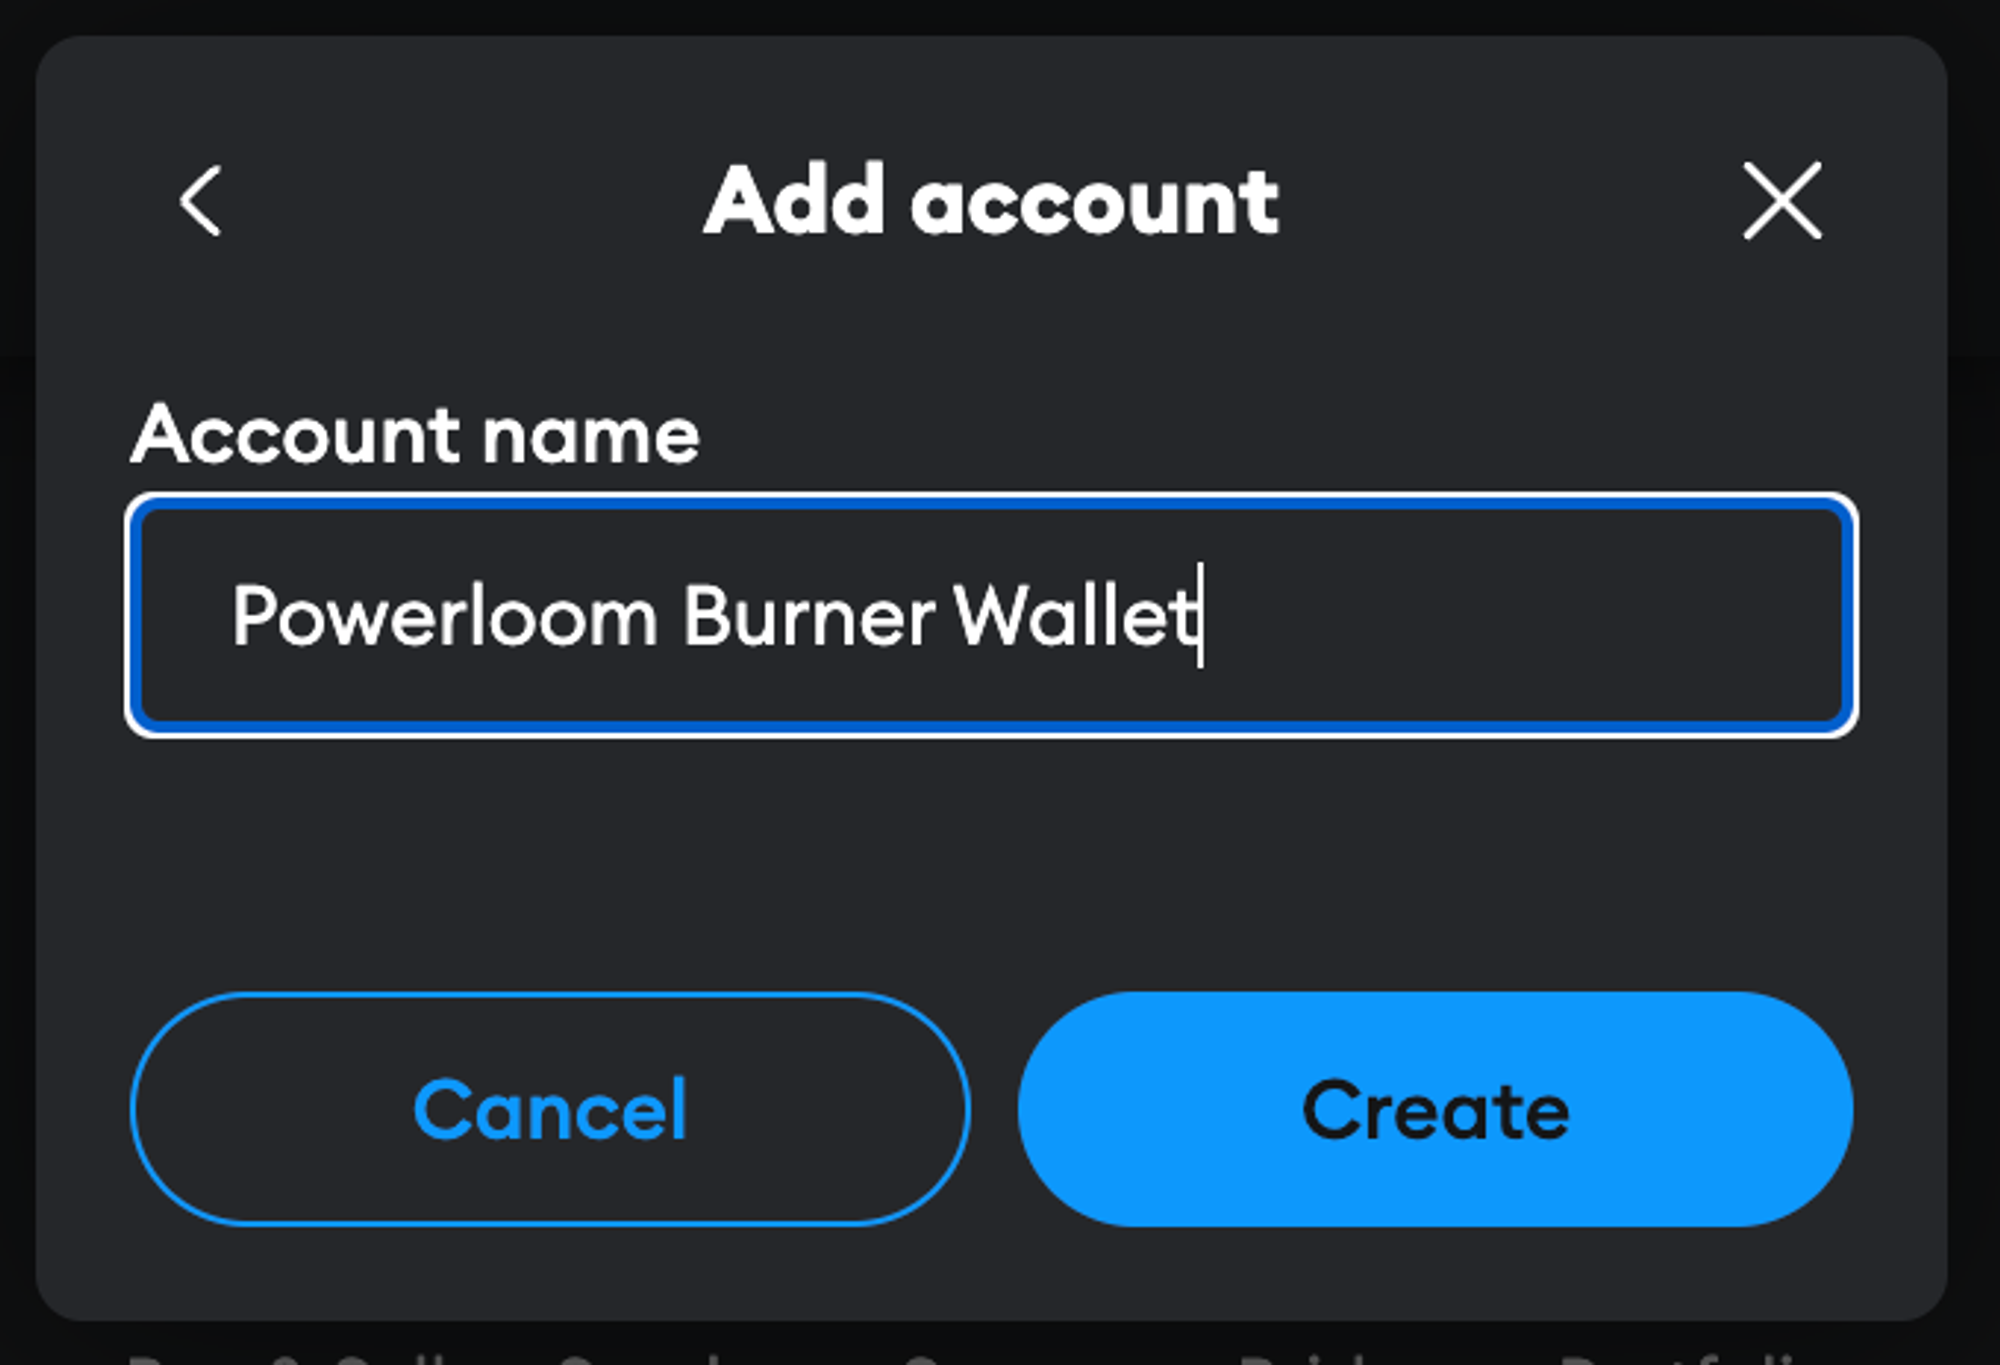
- You will now be able to see 0 ETH in your Metamask extension
Get Sepolia Eth
We need Sepolia Ethereum to run a node as we are working on Sepolia testnet.
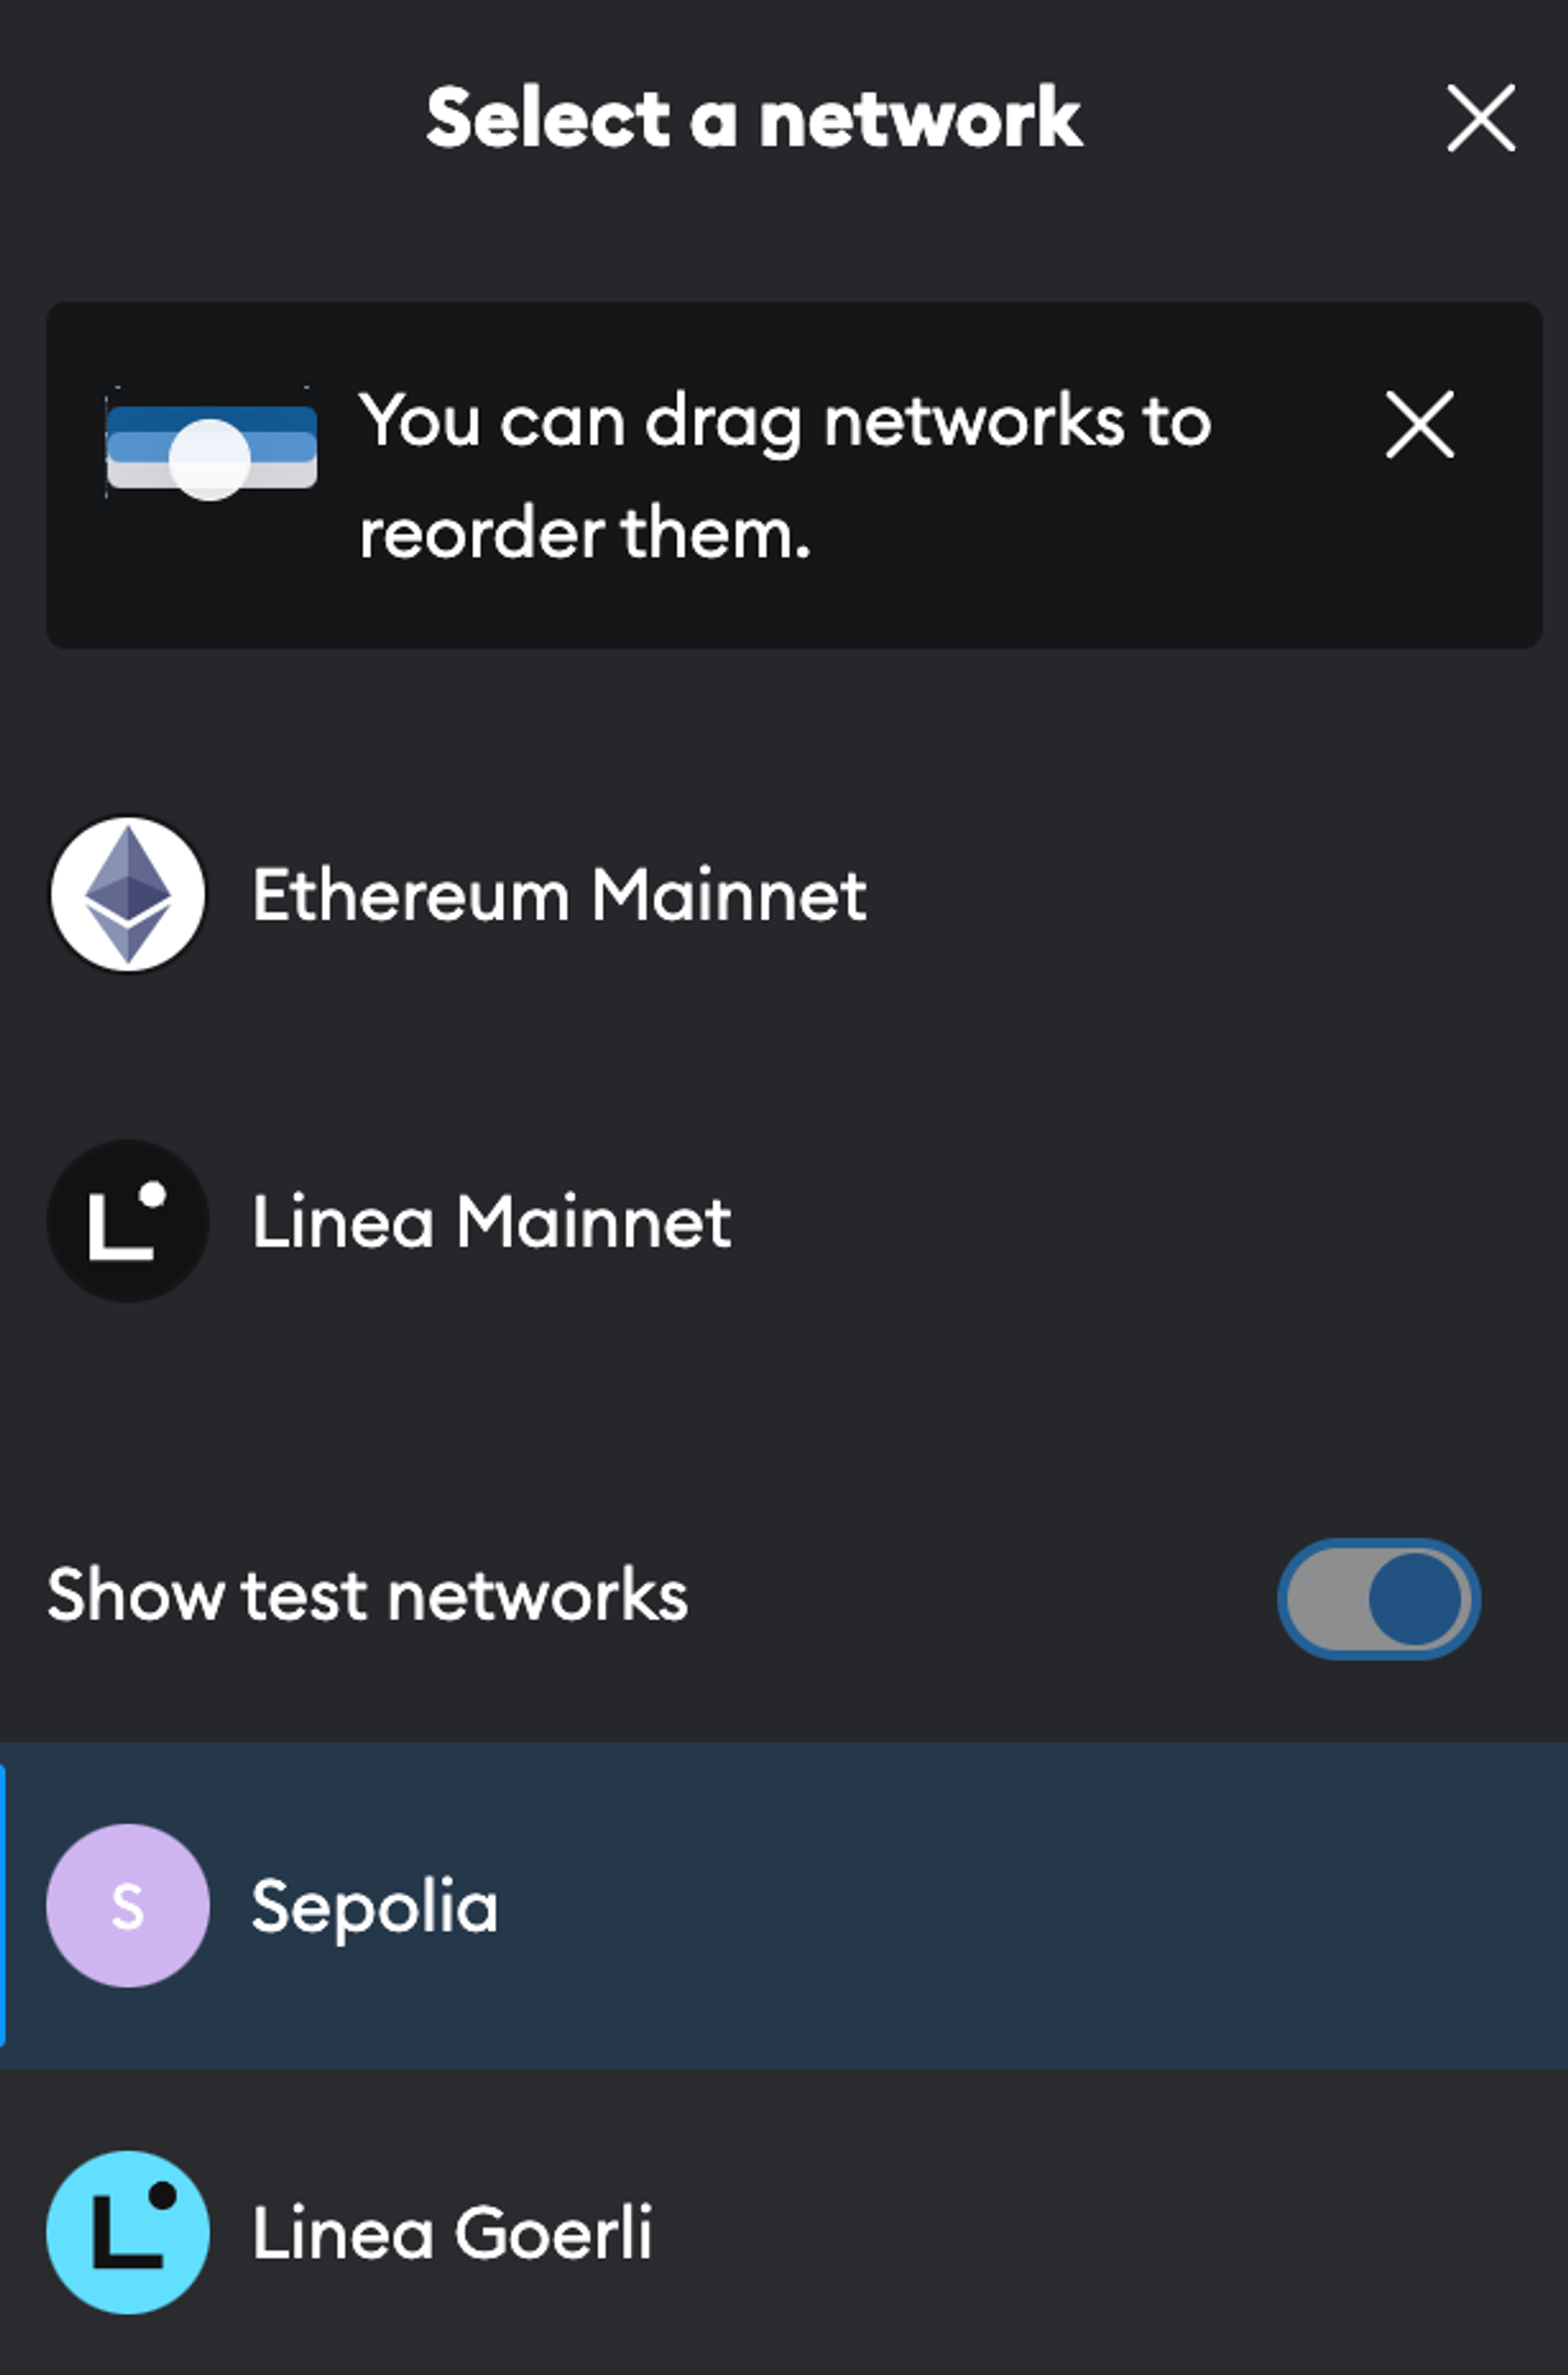
- First, let’s change the network. In the top right corner, you will be able to select a network.
- Click on the toggle “Show test networks” and select Sepolia
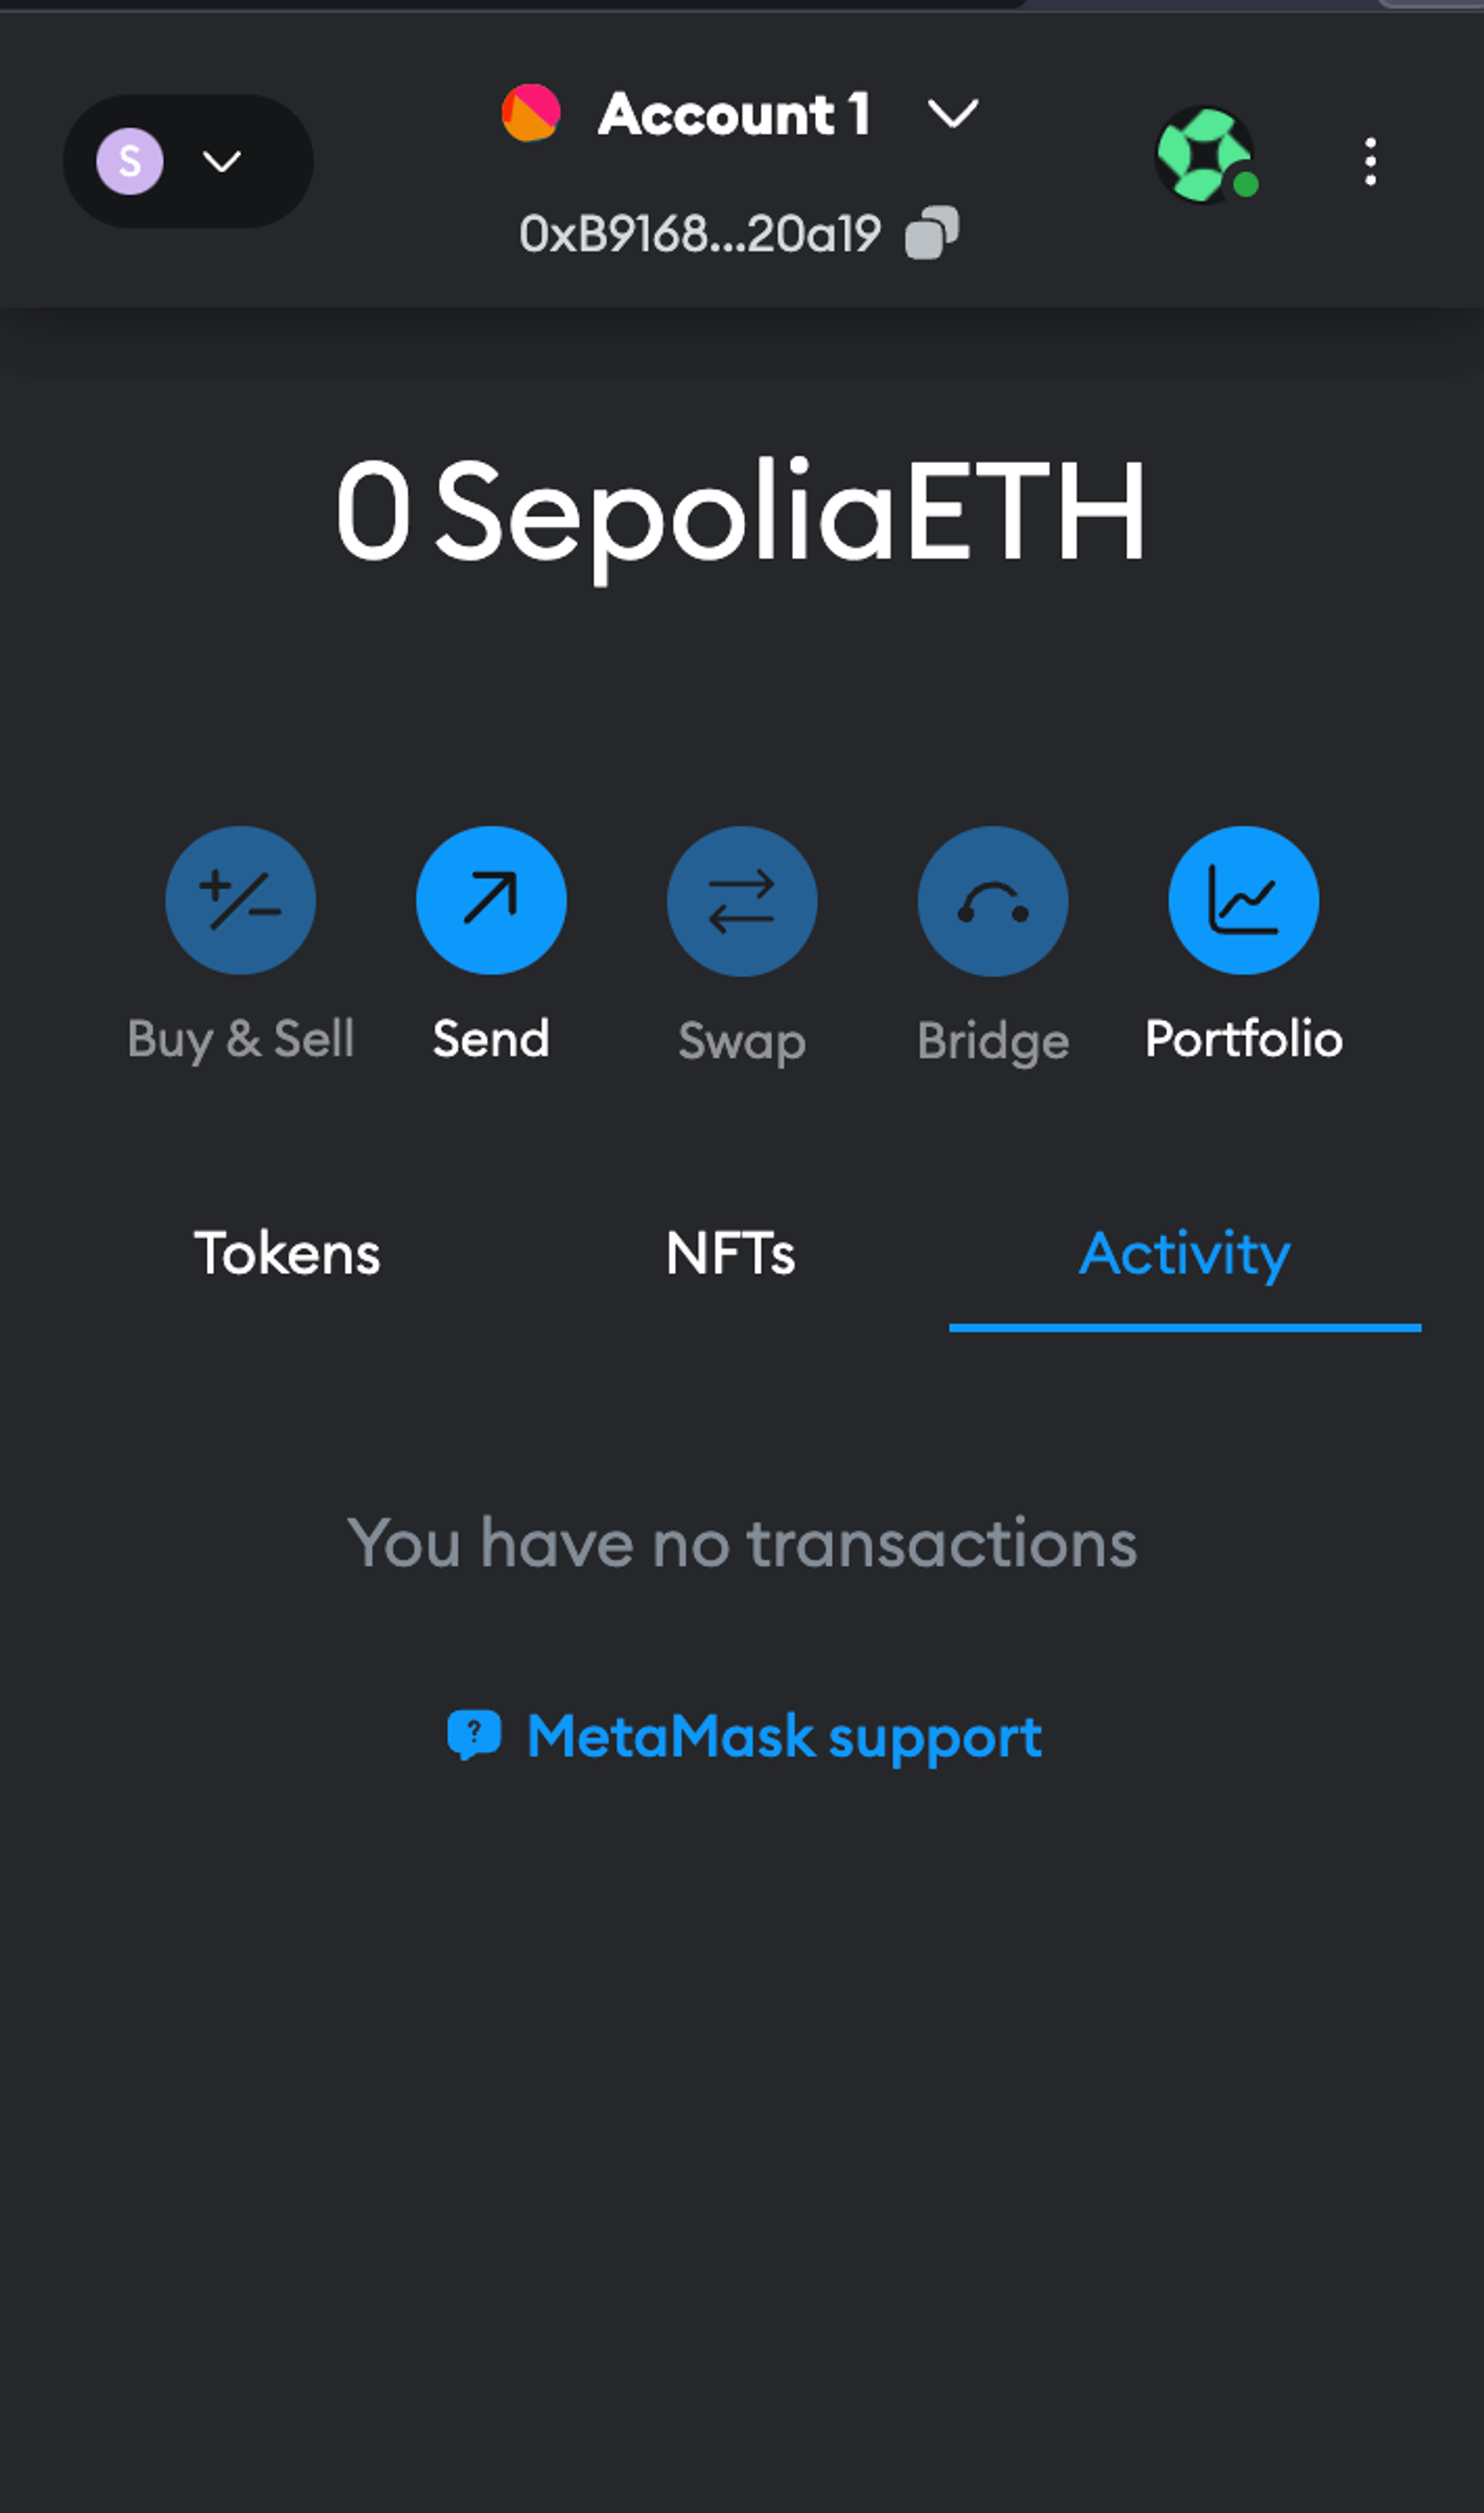
- When you will come back to your wallet, you will be able to see 0SepoliaEth
Getting some free Sepolia eth is really simple.
- Go to https://faucets.chain.link/sepolia
- It will prompt you to connect wallet
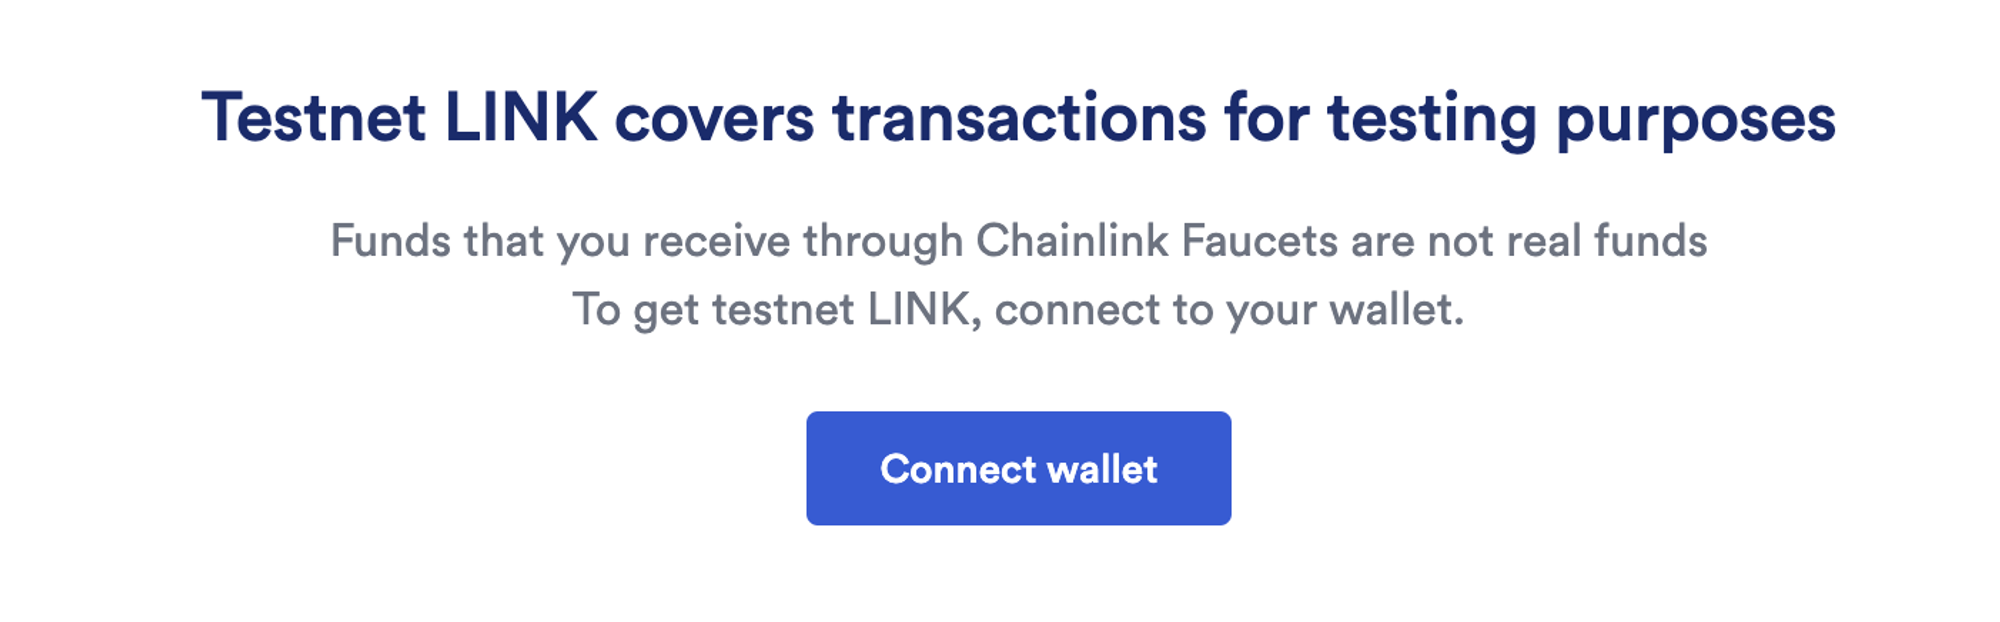
- Verify your account then select “get .25 Sepolia Eth” and then click on “Send request”
- It will take some time, wait for confirmation:
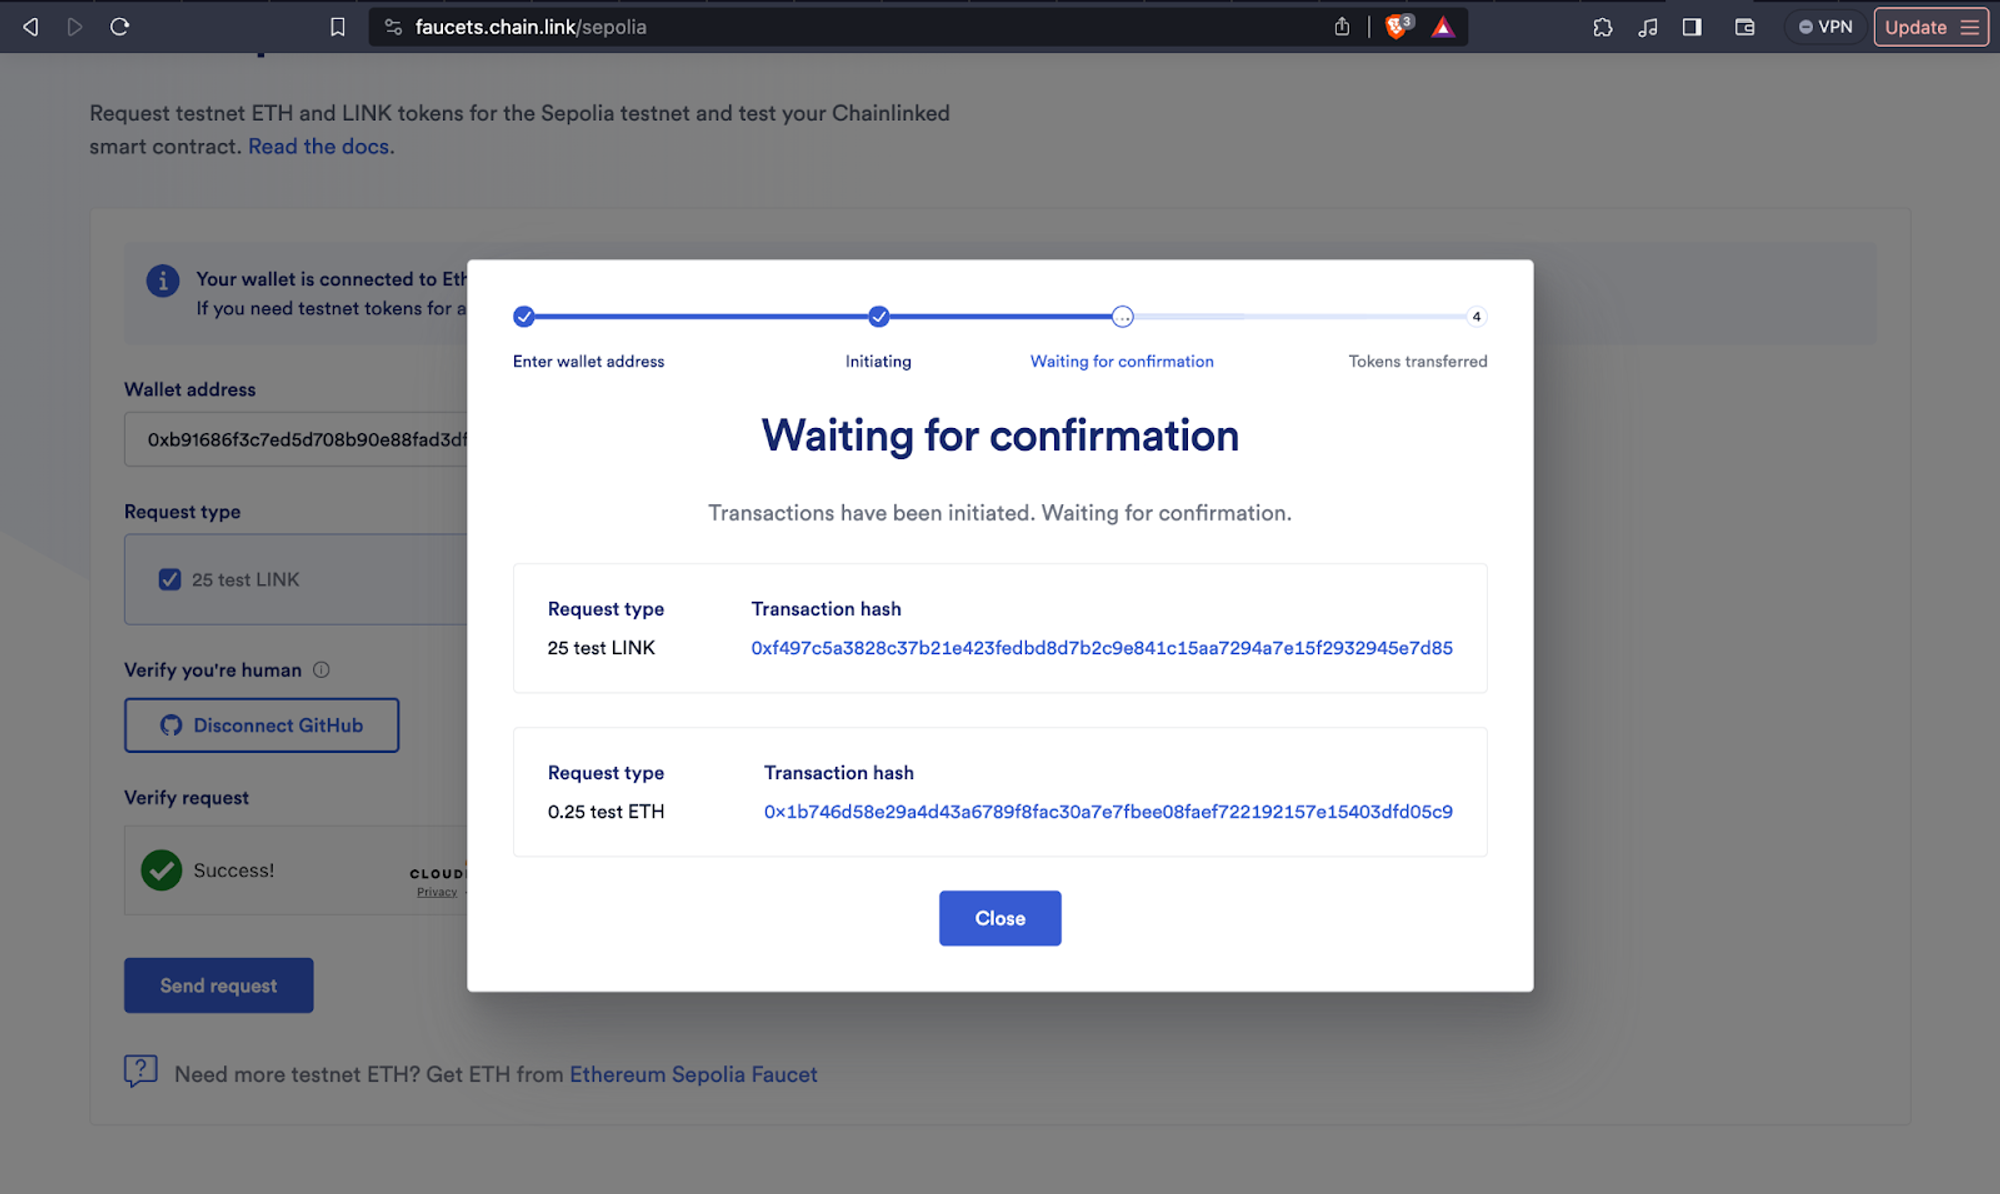
Once it is done, you will see 0.25 Sepolia Eth in your Metamask wallet.
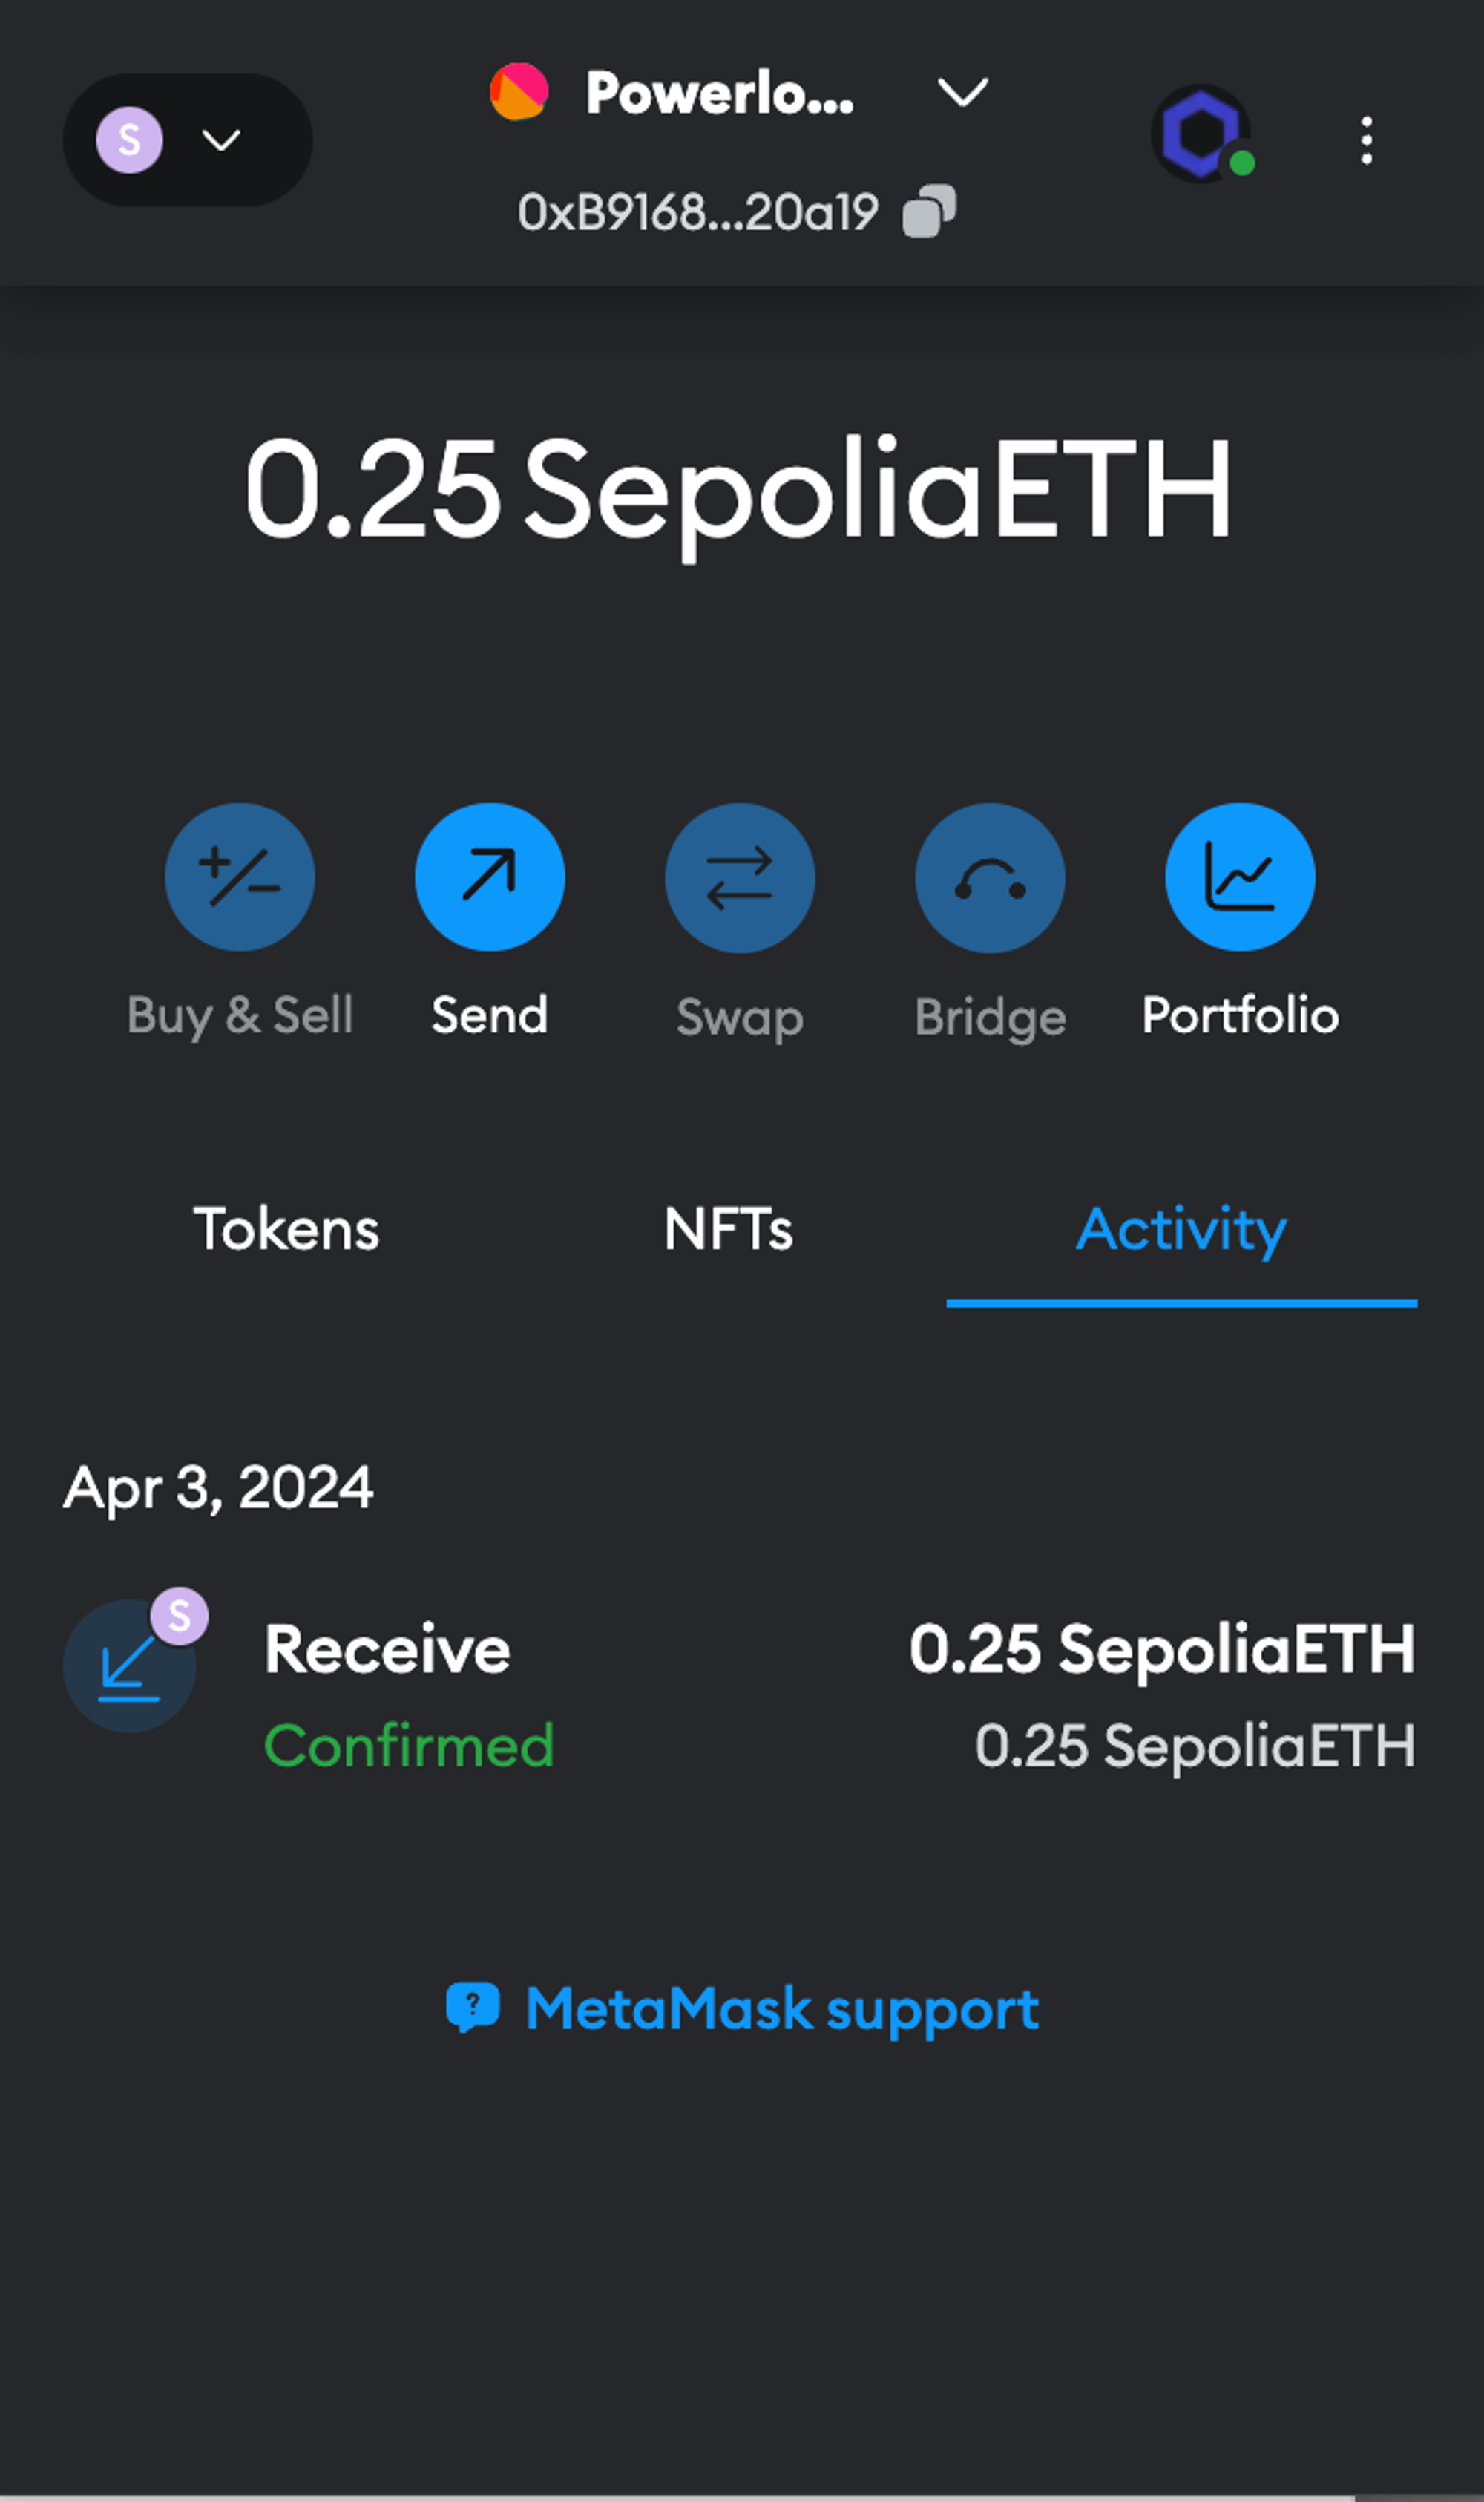
Your setup for the burner wallet is complete. You now have enough Sepolia eth to get started. Congratulations!
2. Mint NFT
Note: Mint this NFT to obtain your slot ID, which we will use in later steps.
Now that your system is ready, let’s deploy our node.
- Visit https://devnet-mint.powerloom.dev and connect your wallet. You can select the “quantity” of slots you want to mint. Let’s start with 1. You can mint more as well depending on your requirements. Then, click “Mint”:
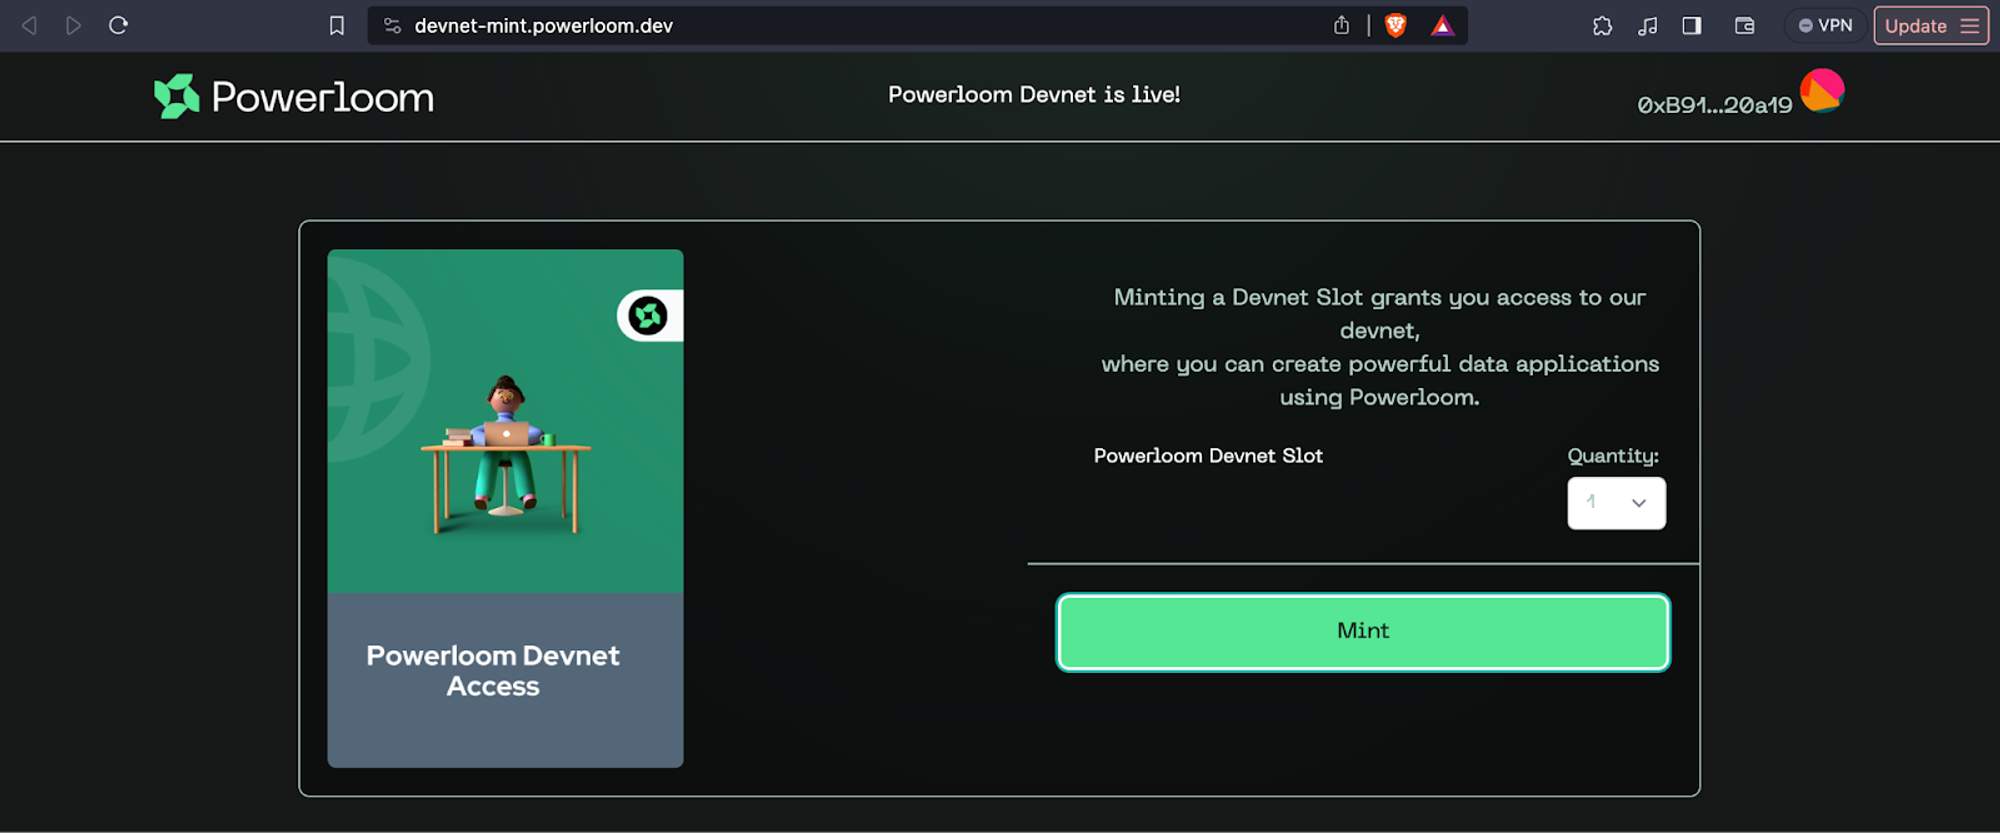
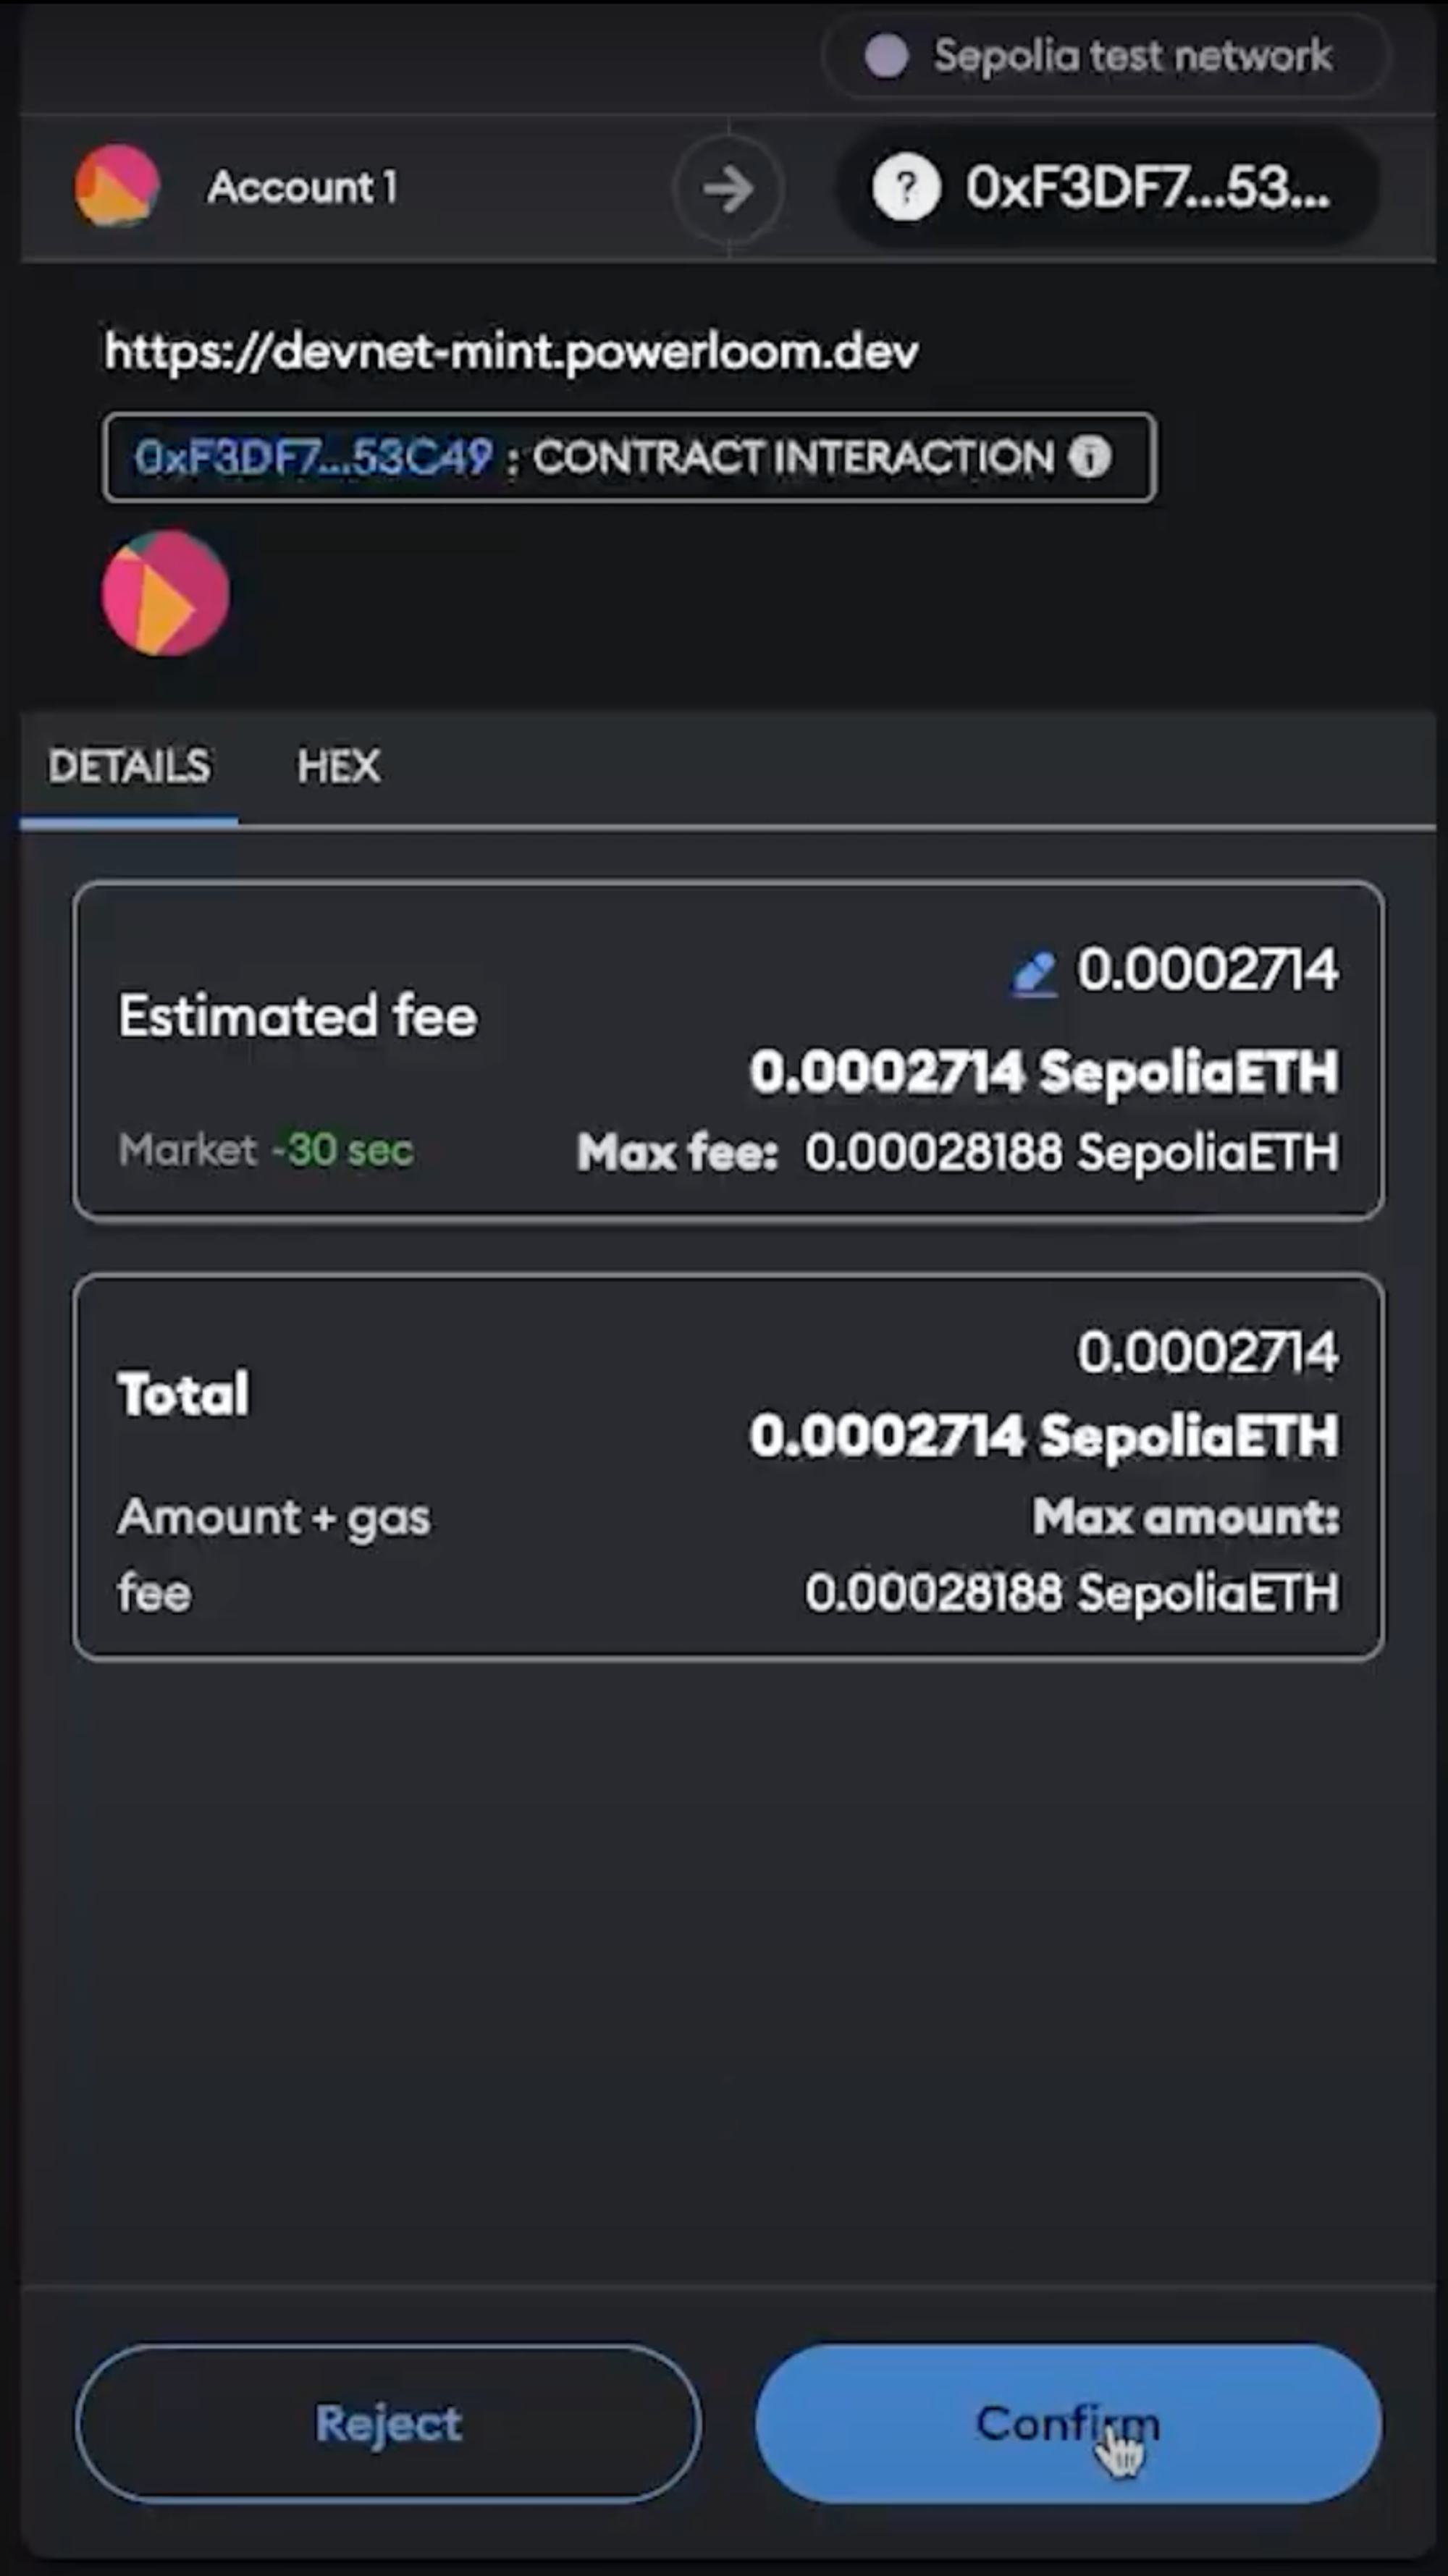
It will redirect you to Metamask to confirm the transaction. Click “Confirm”:
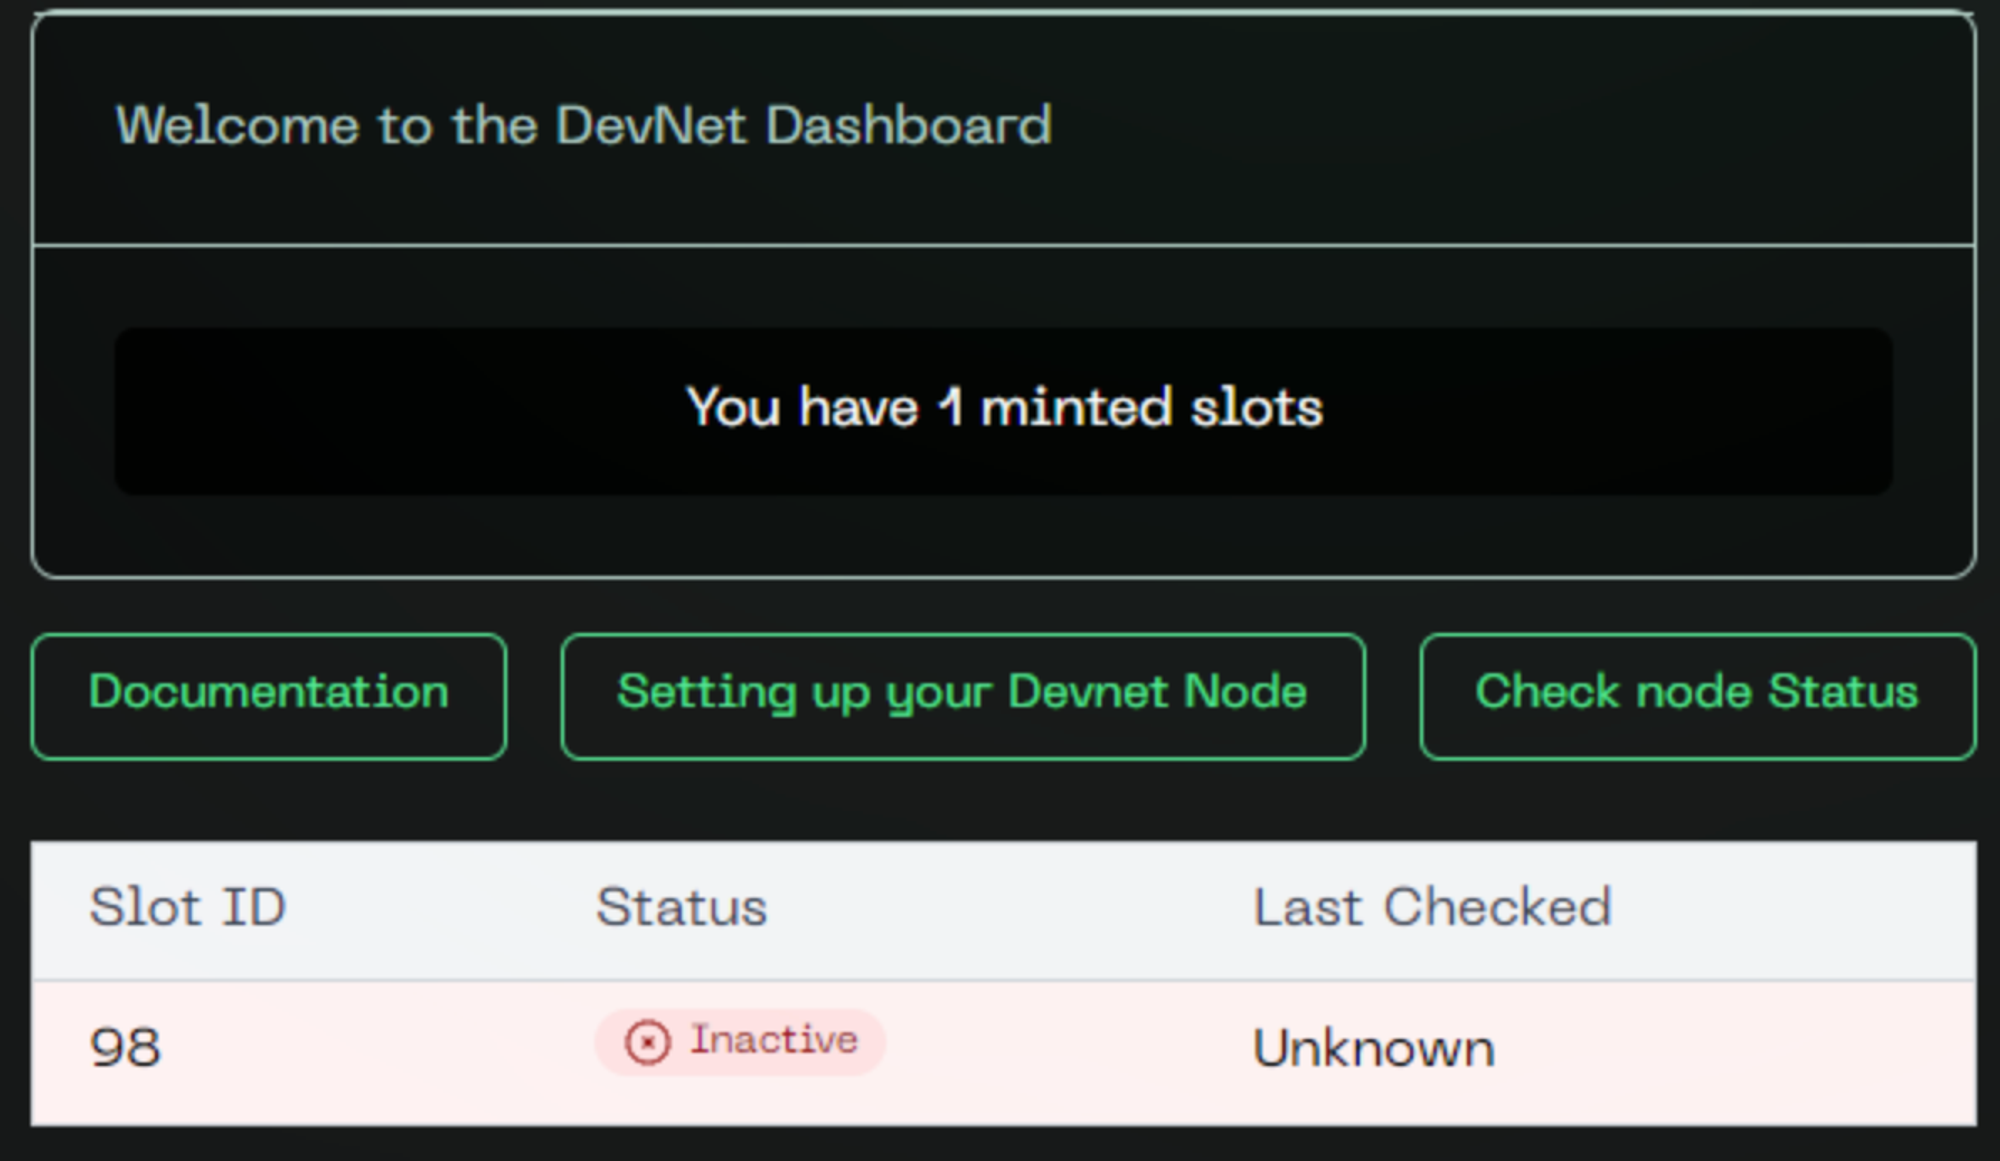
- You will see the Devnet dashboard that will show you all the details:
- Slot ID: This is your slot ID, Keep it safe for all your future references
- Status: Check the status of your node. Currently, it is inactive
- Last Checked: Timestamp for the node when it was active
To verify the transaction:
- For Metamask: The transaction will be under the Activity section.
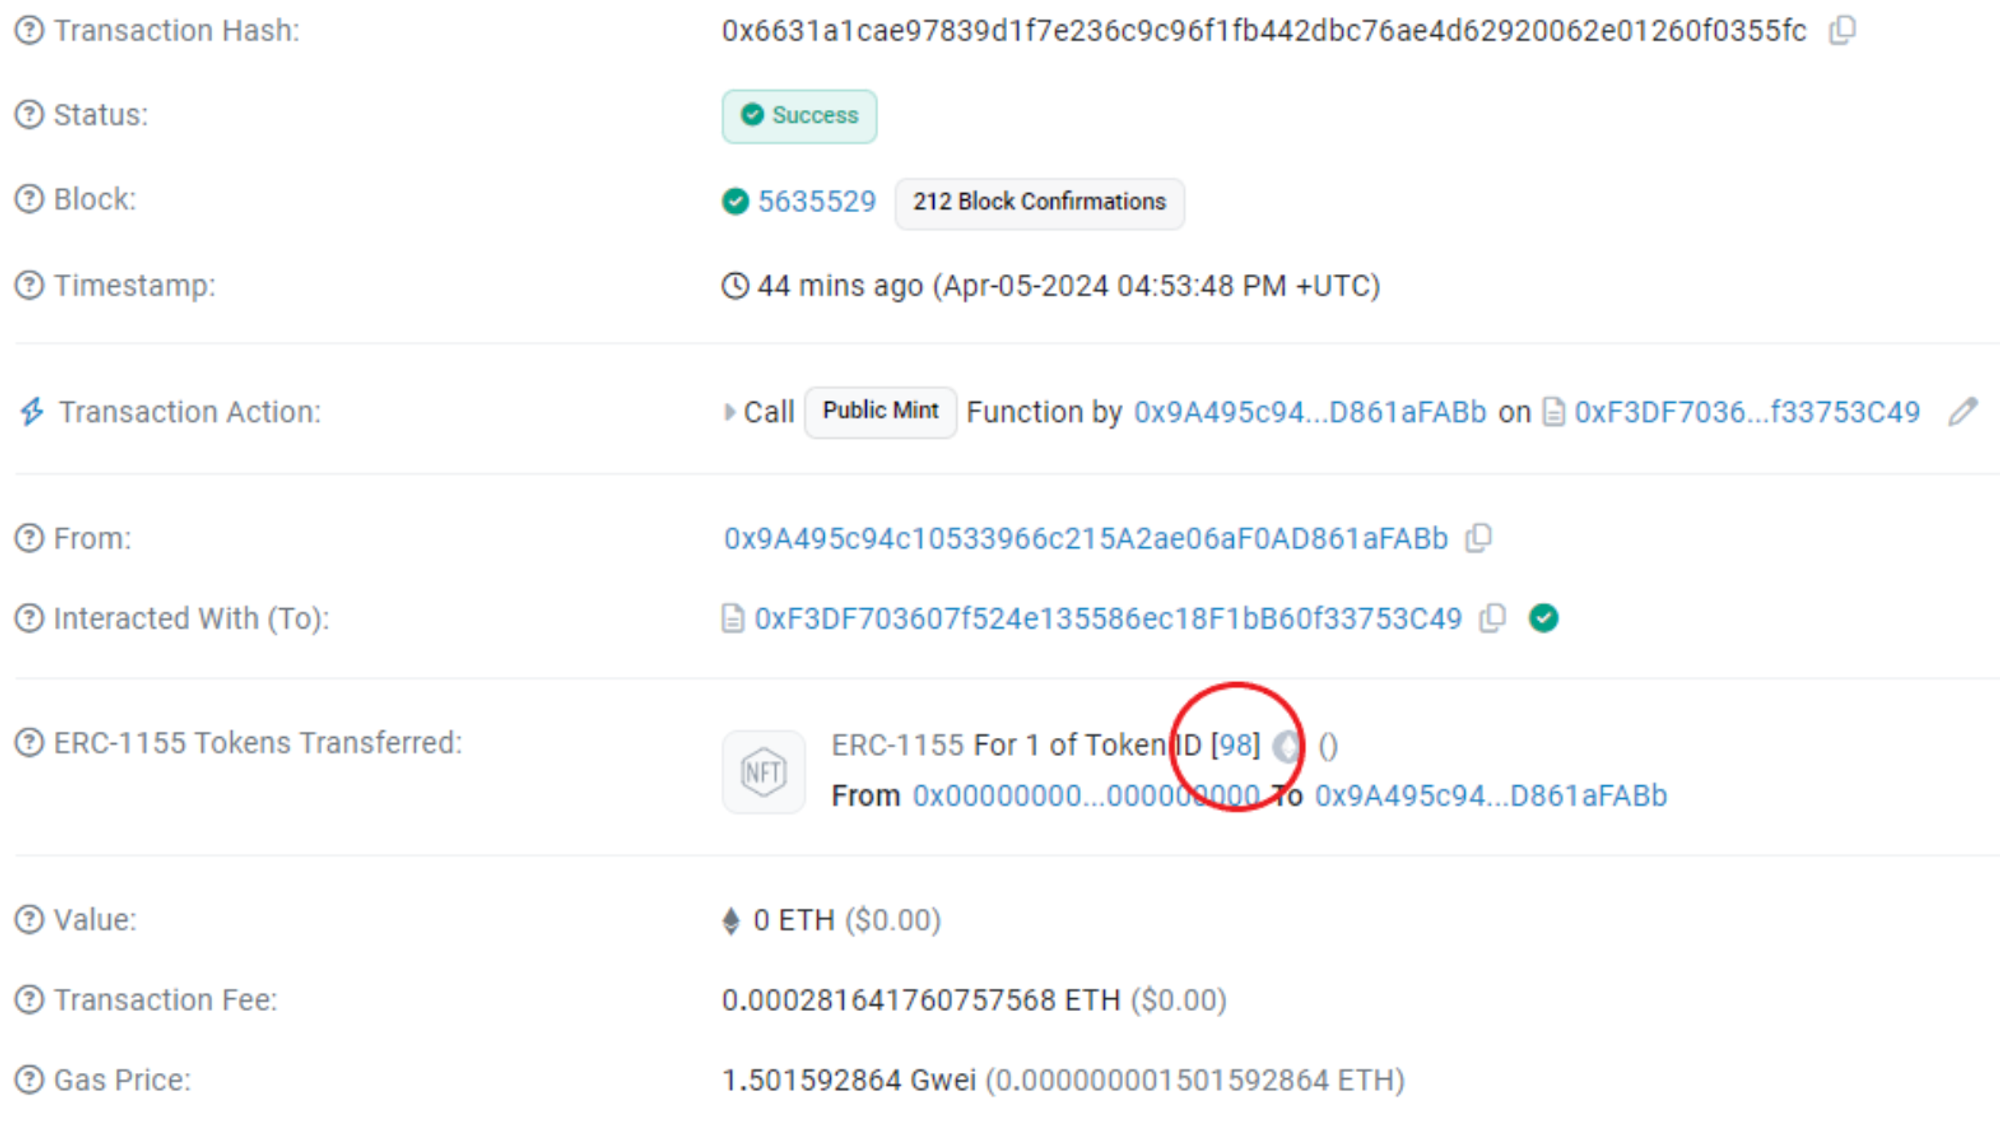
- For other wallets: Search for your wallet address in the Sepolia block explorer; the mint will be the latest transaction.
- Locate the minted Token ID under the ERC-1155 Tokens Transferred section.
Setup Snapshotter Node
Clone Repositories
To setup the Snapshotter node, let’s set up our project step-by-step
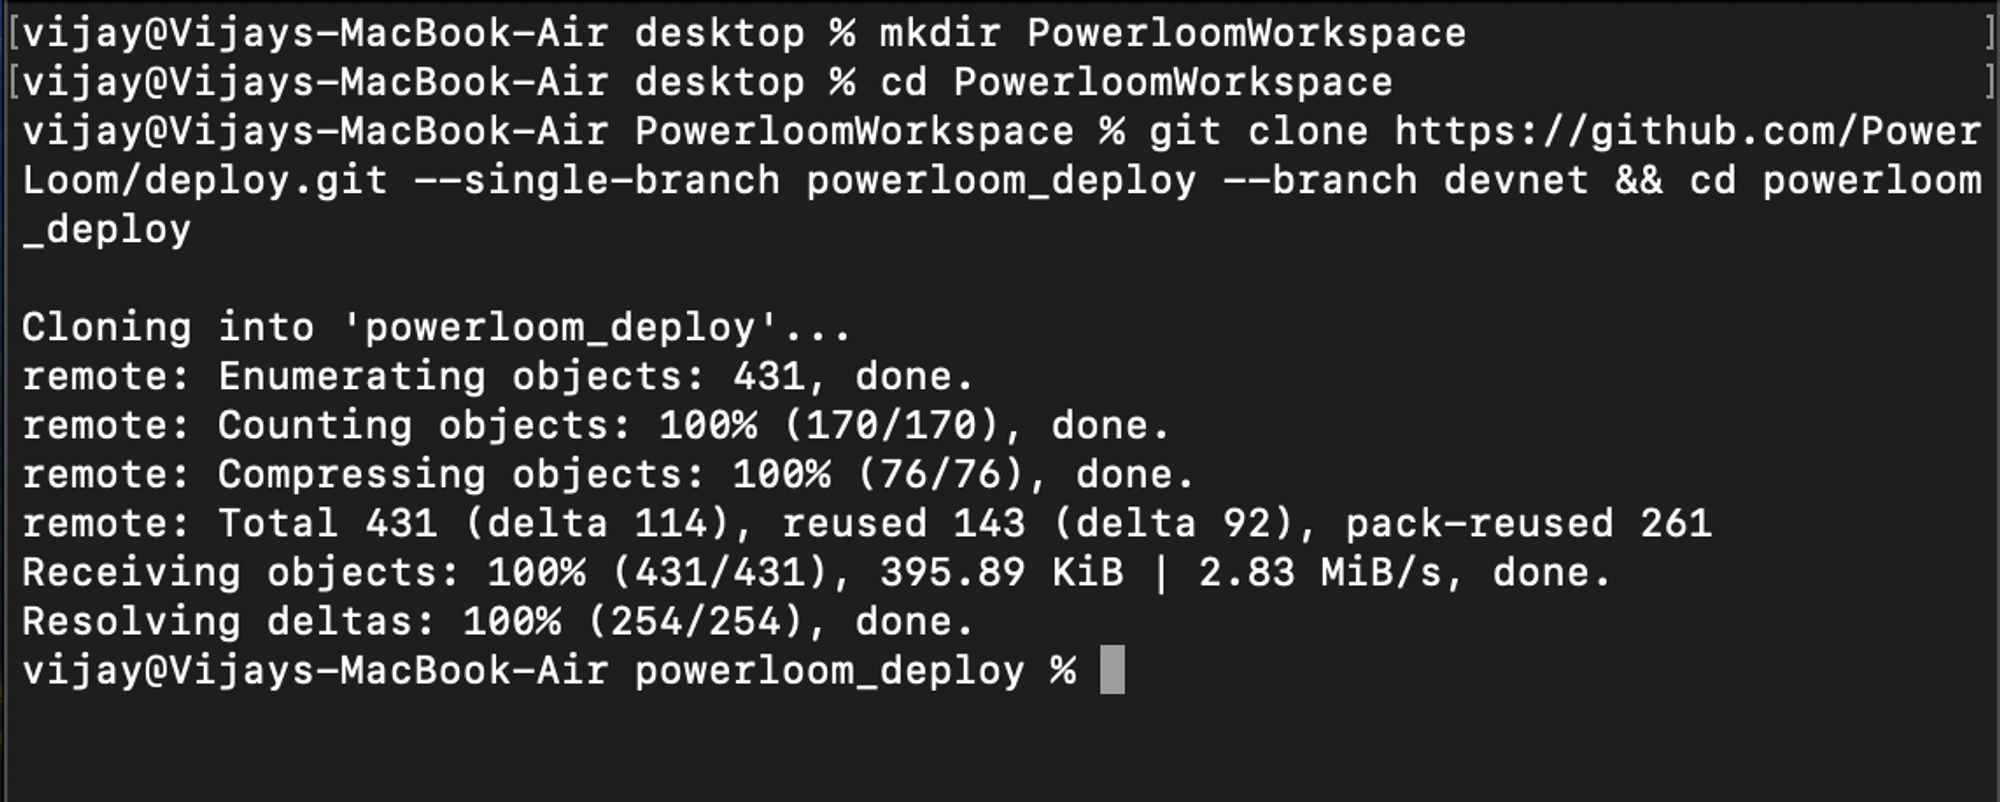
- Open terminal and create a directory

Paste the command below. This creates a directory powerloom_deploy and clones the repository
- Now fork two repositories below to your GitHub account. These two repositories will help us write our own custom code in the future to build any use case we can imagine.
- Make sure to uncheck “copy the main branch only” and then click “Create fork”

- Let’s clone the above-forked repository. To do that run the command below on your terminal:
- https://github.com/<your-github-username>/snapshotter-configs
- https://github.com/<your-github-username>/snapshotter-computes
Configure .env file
In the freshly cloned project inside the root directory, you will find a file called env.example. This is the template that is added as an easy reference to create .env file to run the Snapshotter Node
- Go to the root directory /powerloom-deploy and run the command below:
cat env.example > .env
Open the file and let’s configure the .env file to run the node by understanding each variable:
- SOURCE_RPC_URL: This URL is needed to establish RPC interactions on the Ethereum blockchain.
- To obtain it, go to https://www.ankr.com/ click “Start For Free” and then sign in
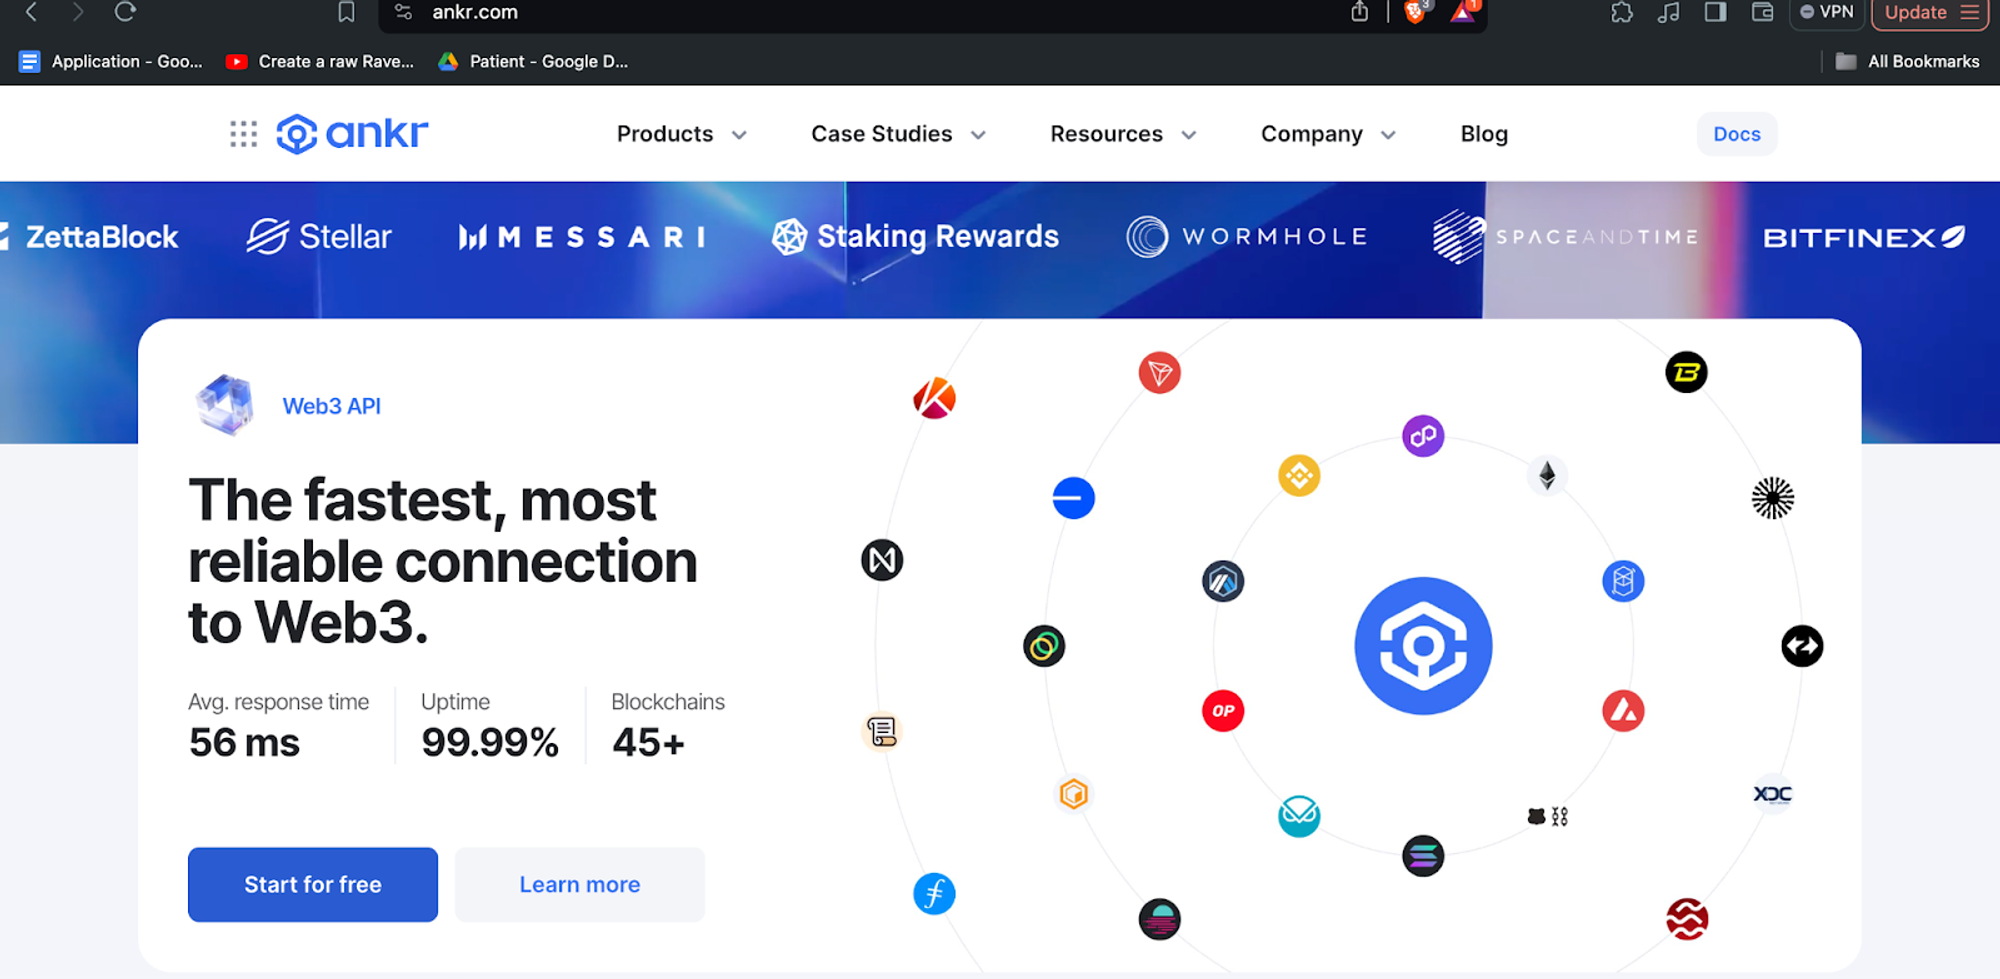
- On the Dashboard, you will see a list of chains, select “Ethereum”
- It will redirect you to a new page dedicated to endpoints for Ethereum. Select Testnet -> Sepolia. Now copy the HTTPS Endpoint generated.
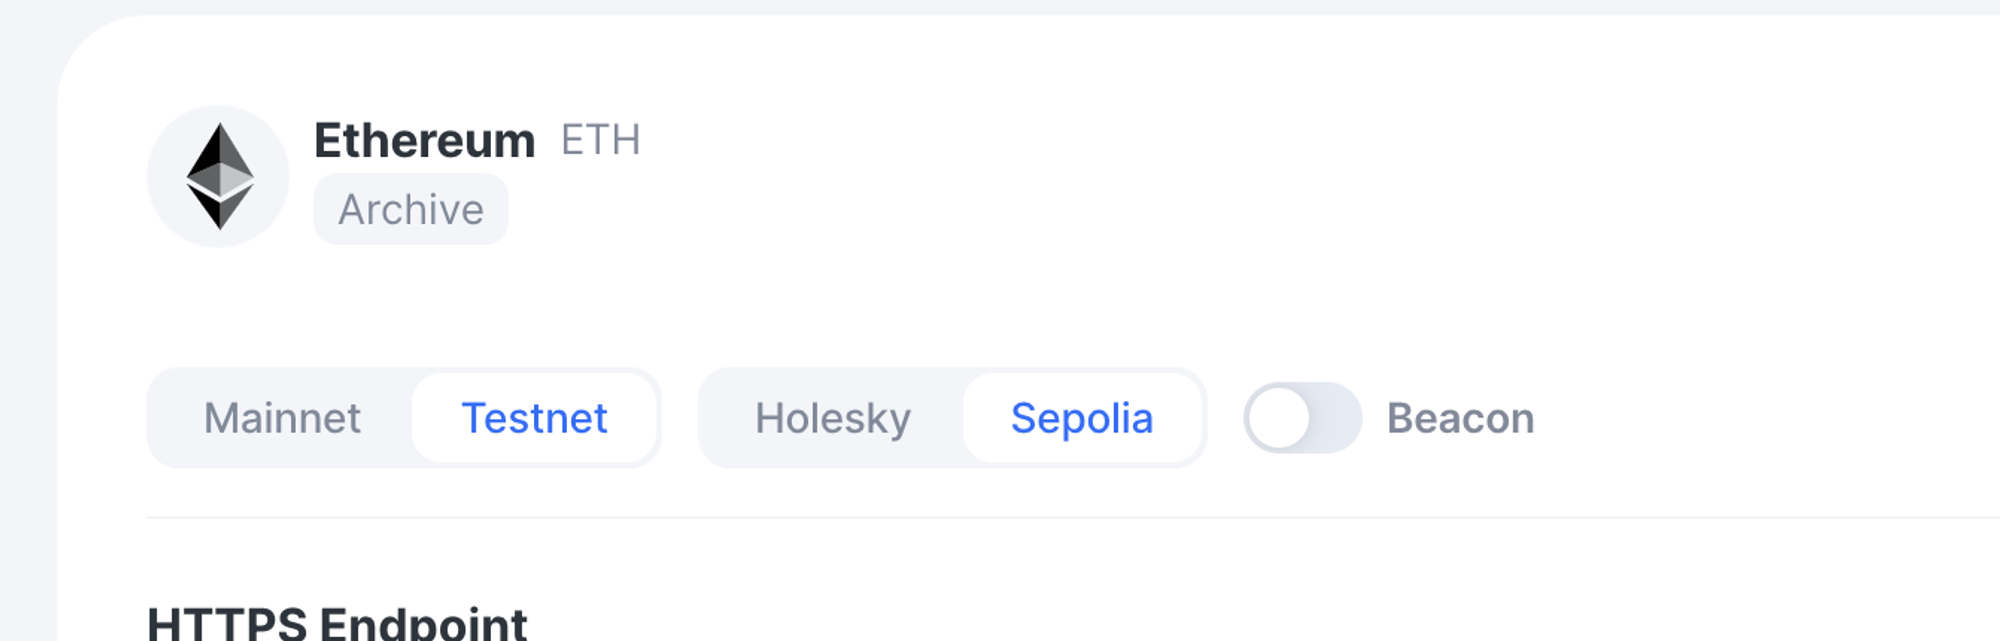
- Paste this in your .env file for SOURCE_RPC_URL
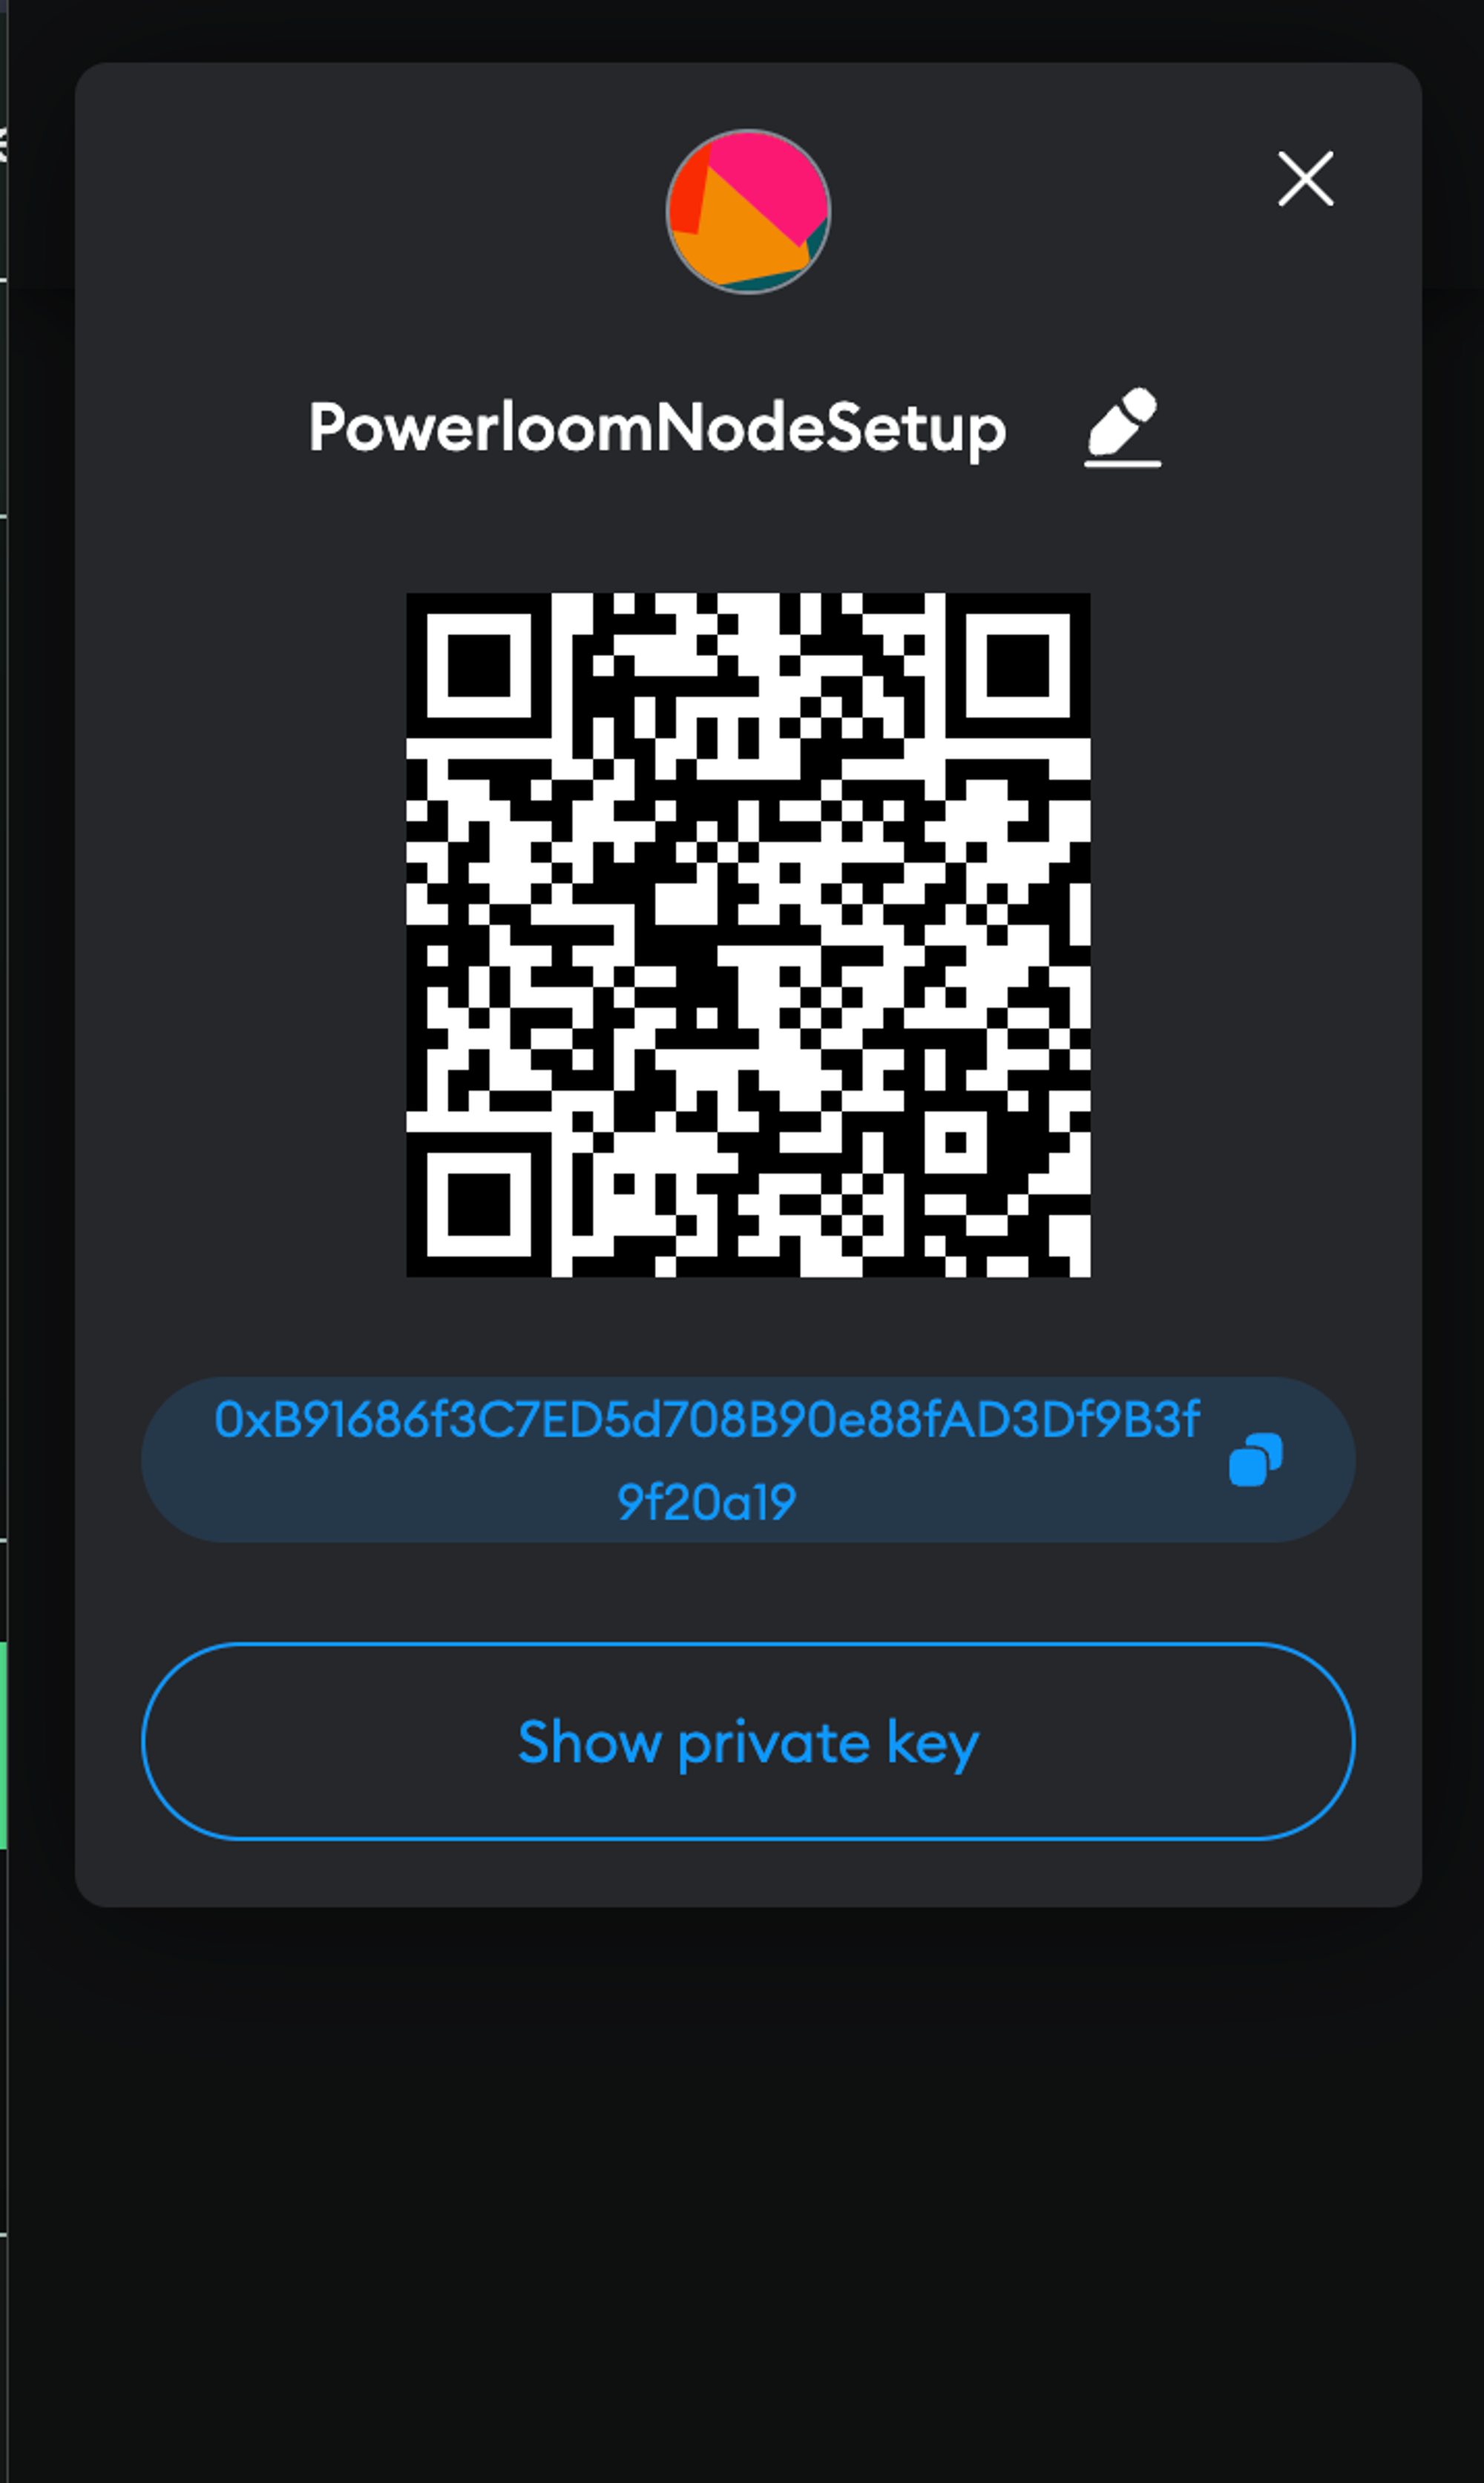
- SIGNER_ACCOUNT_ADDRESS: This is the address of your disposable burner wallet address that we set up in step 1.
- Go to Metamask, copy the address of your burner wallet, and paste it in .env for SIGNER_ACCOUNT_ADDRESS
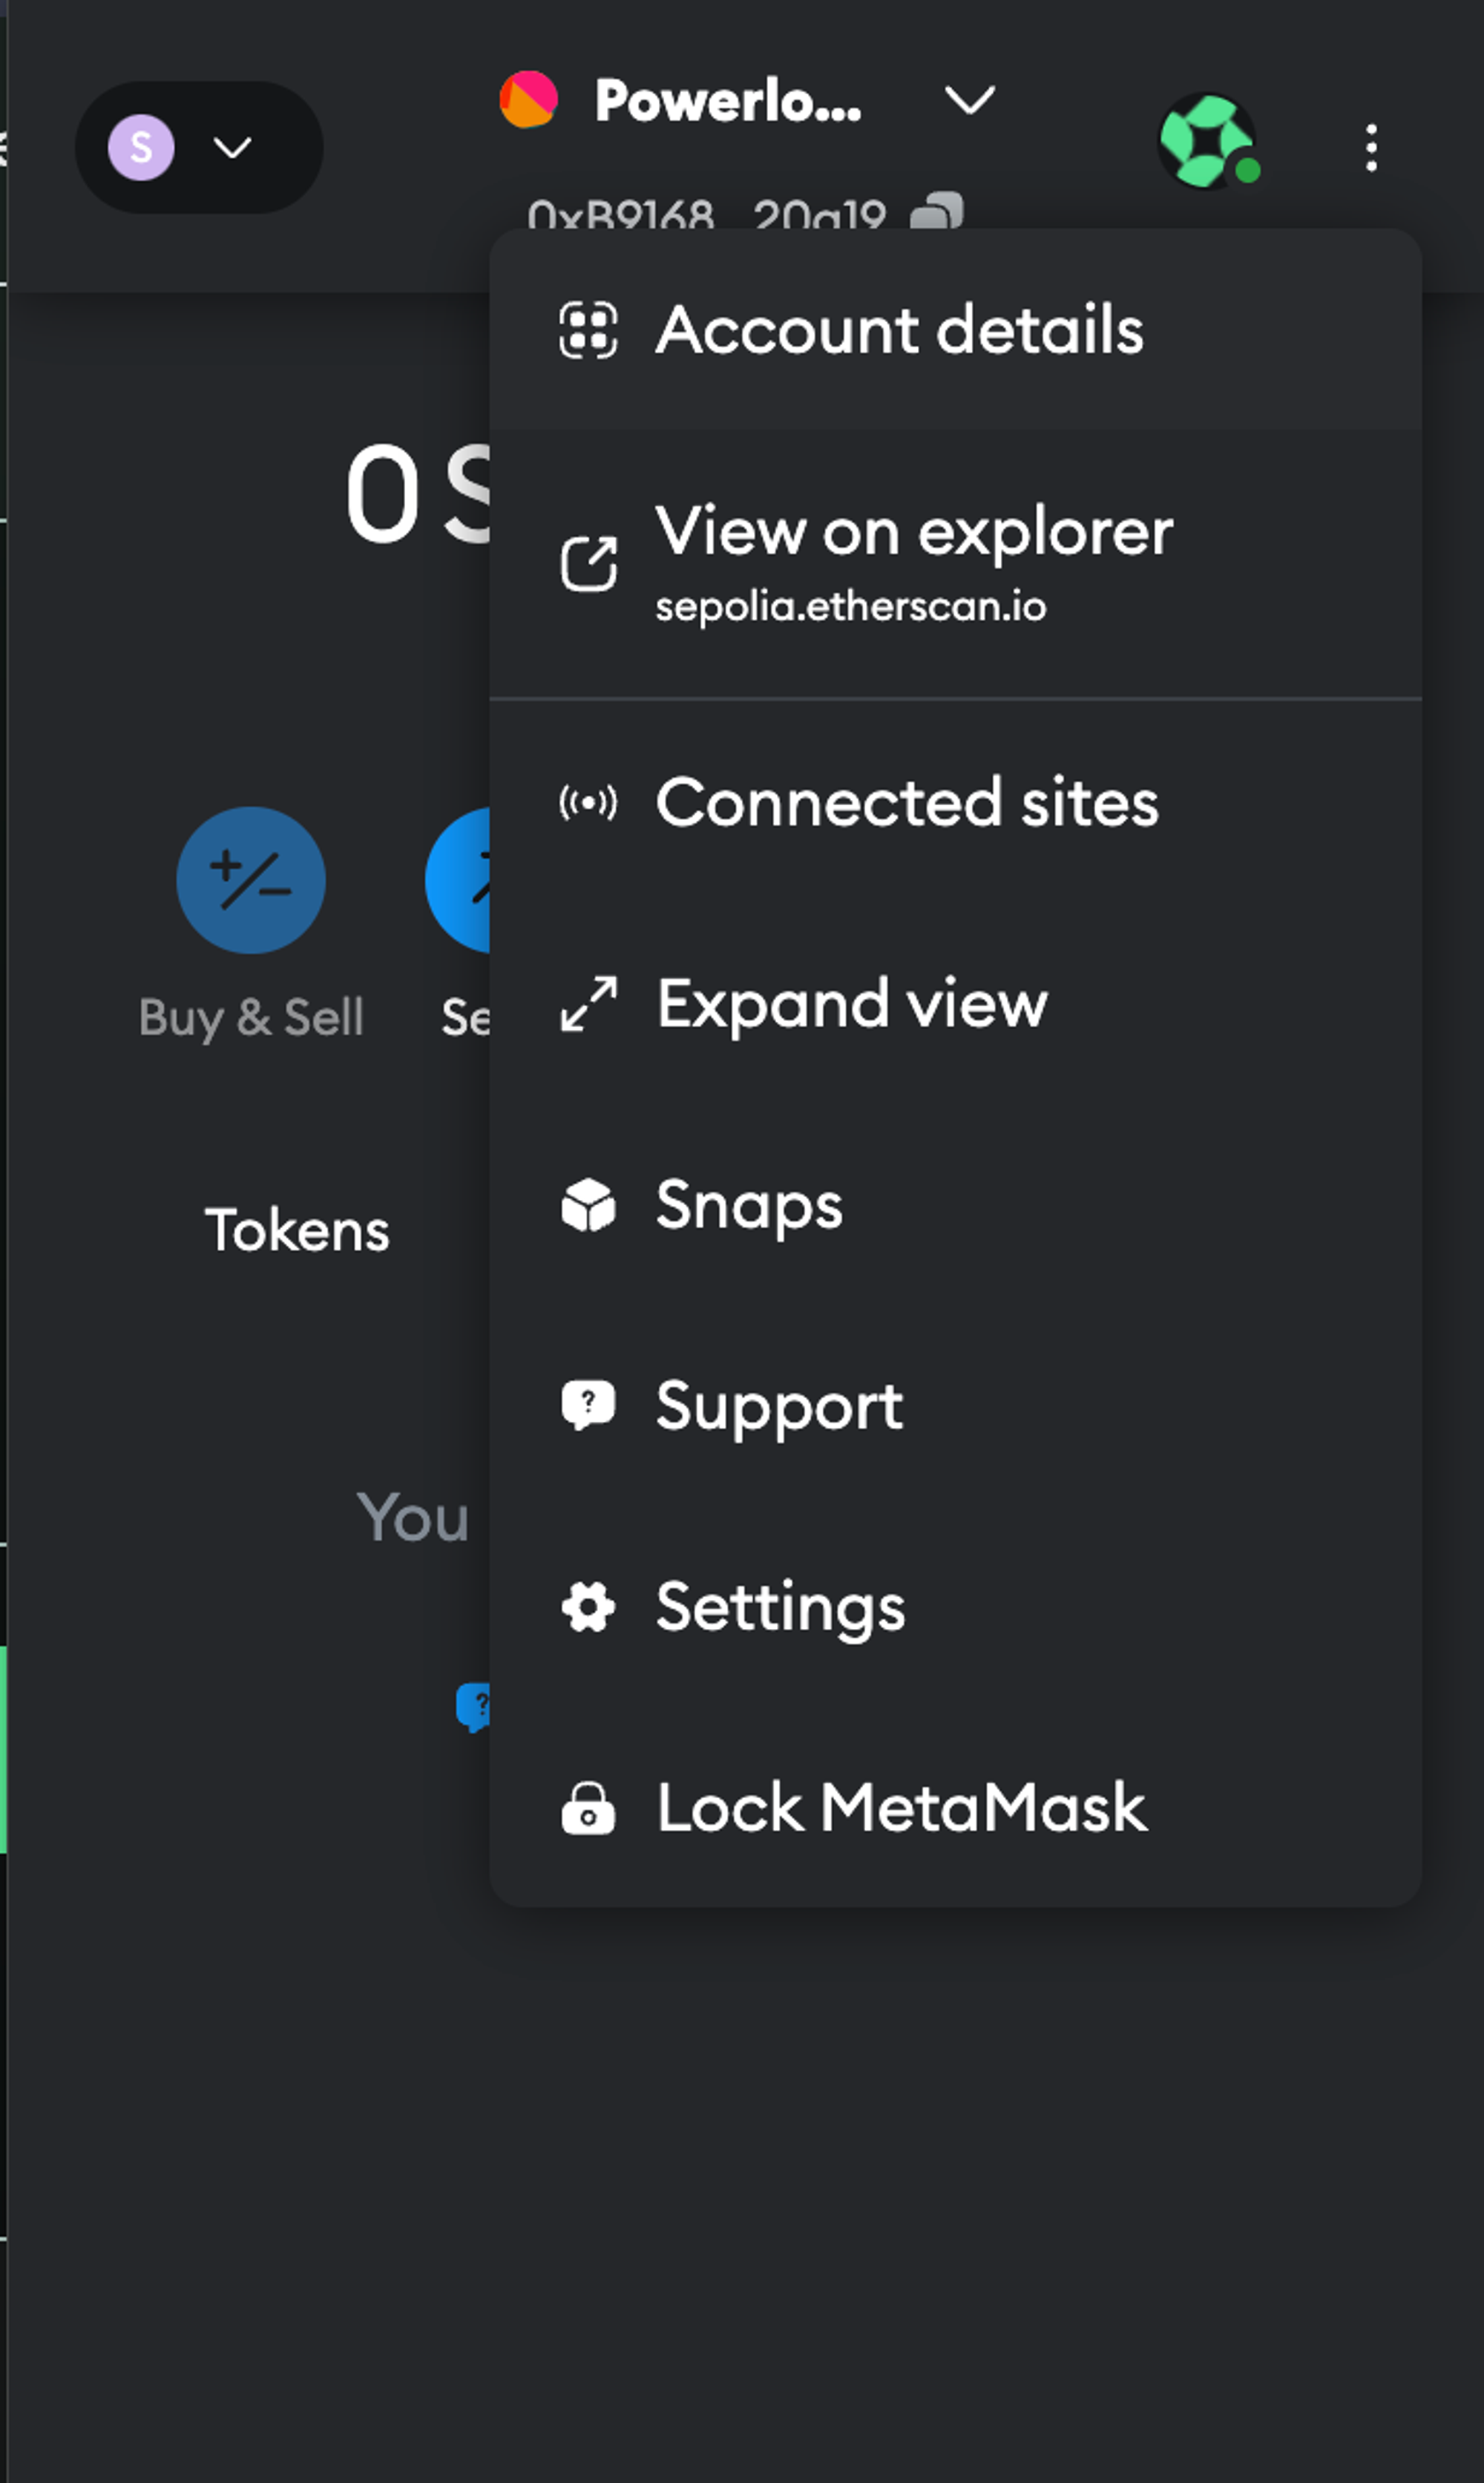
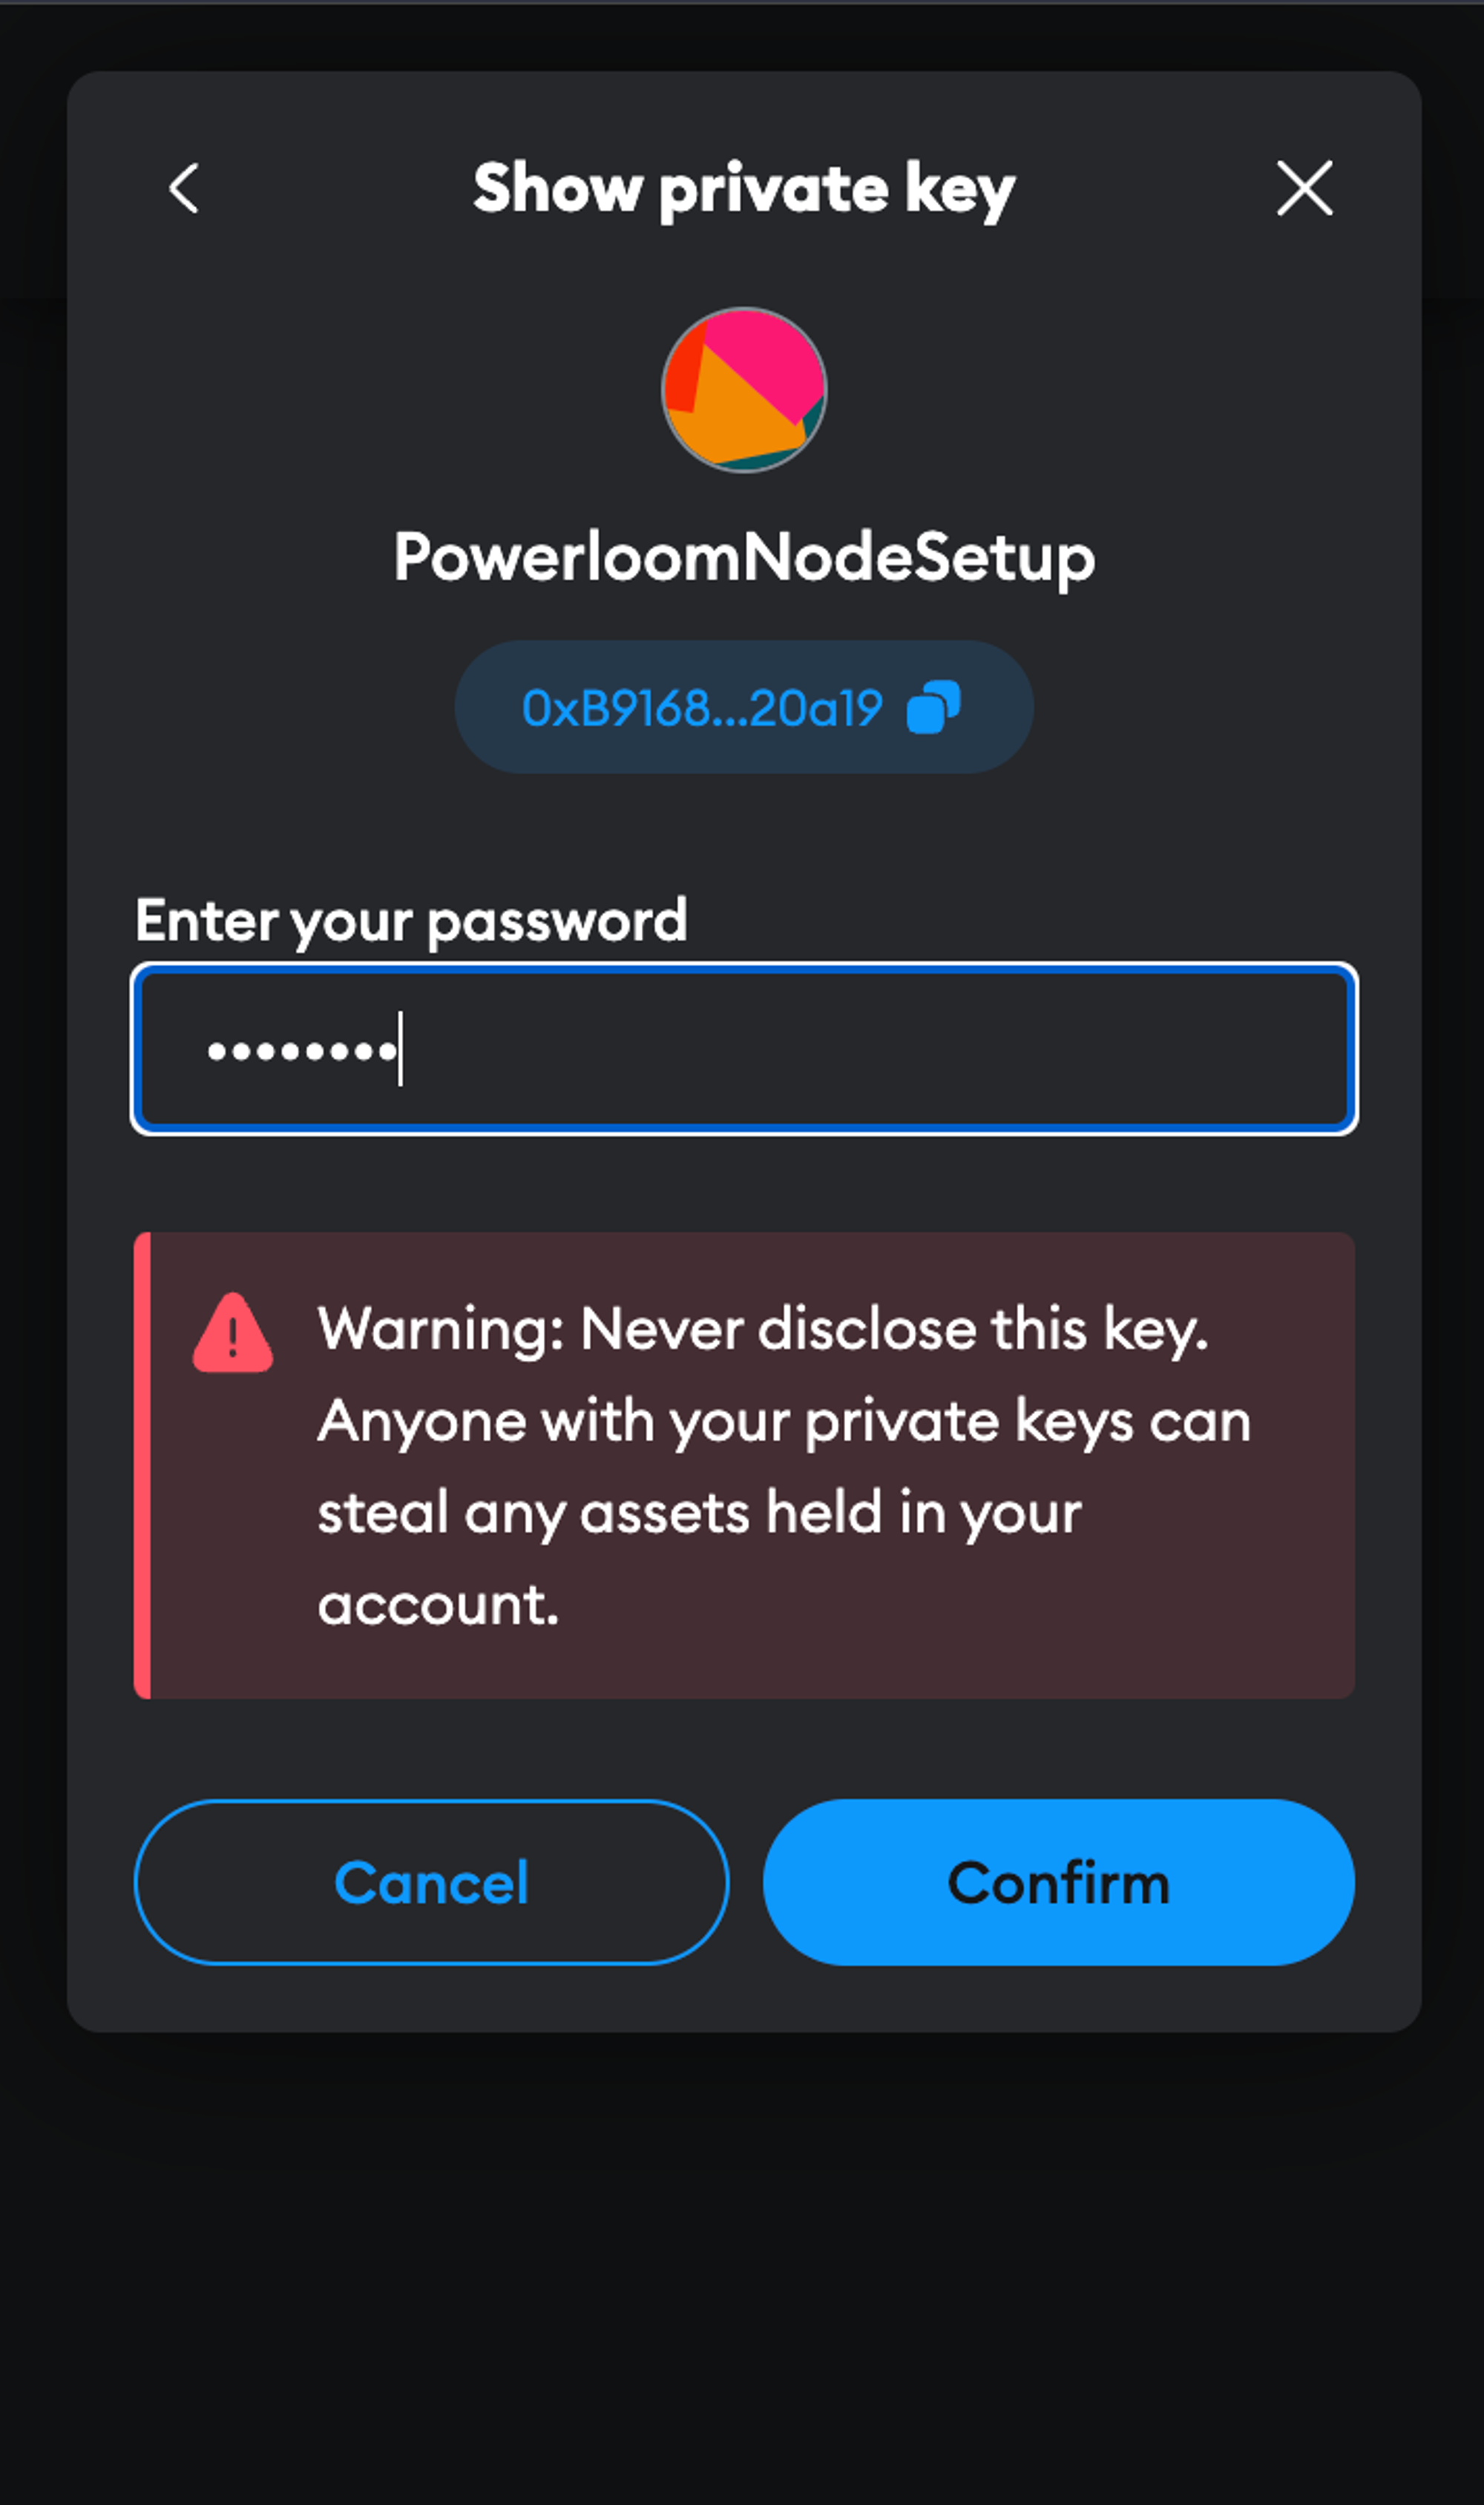
- SIGNER_ACCOUNT_PRIVATE_KEY: This is the private key of your burner wallet.
- Go to Metamask click on three vertical dots in the top right-hand corner and click on Account Details
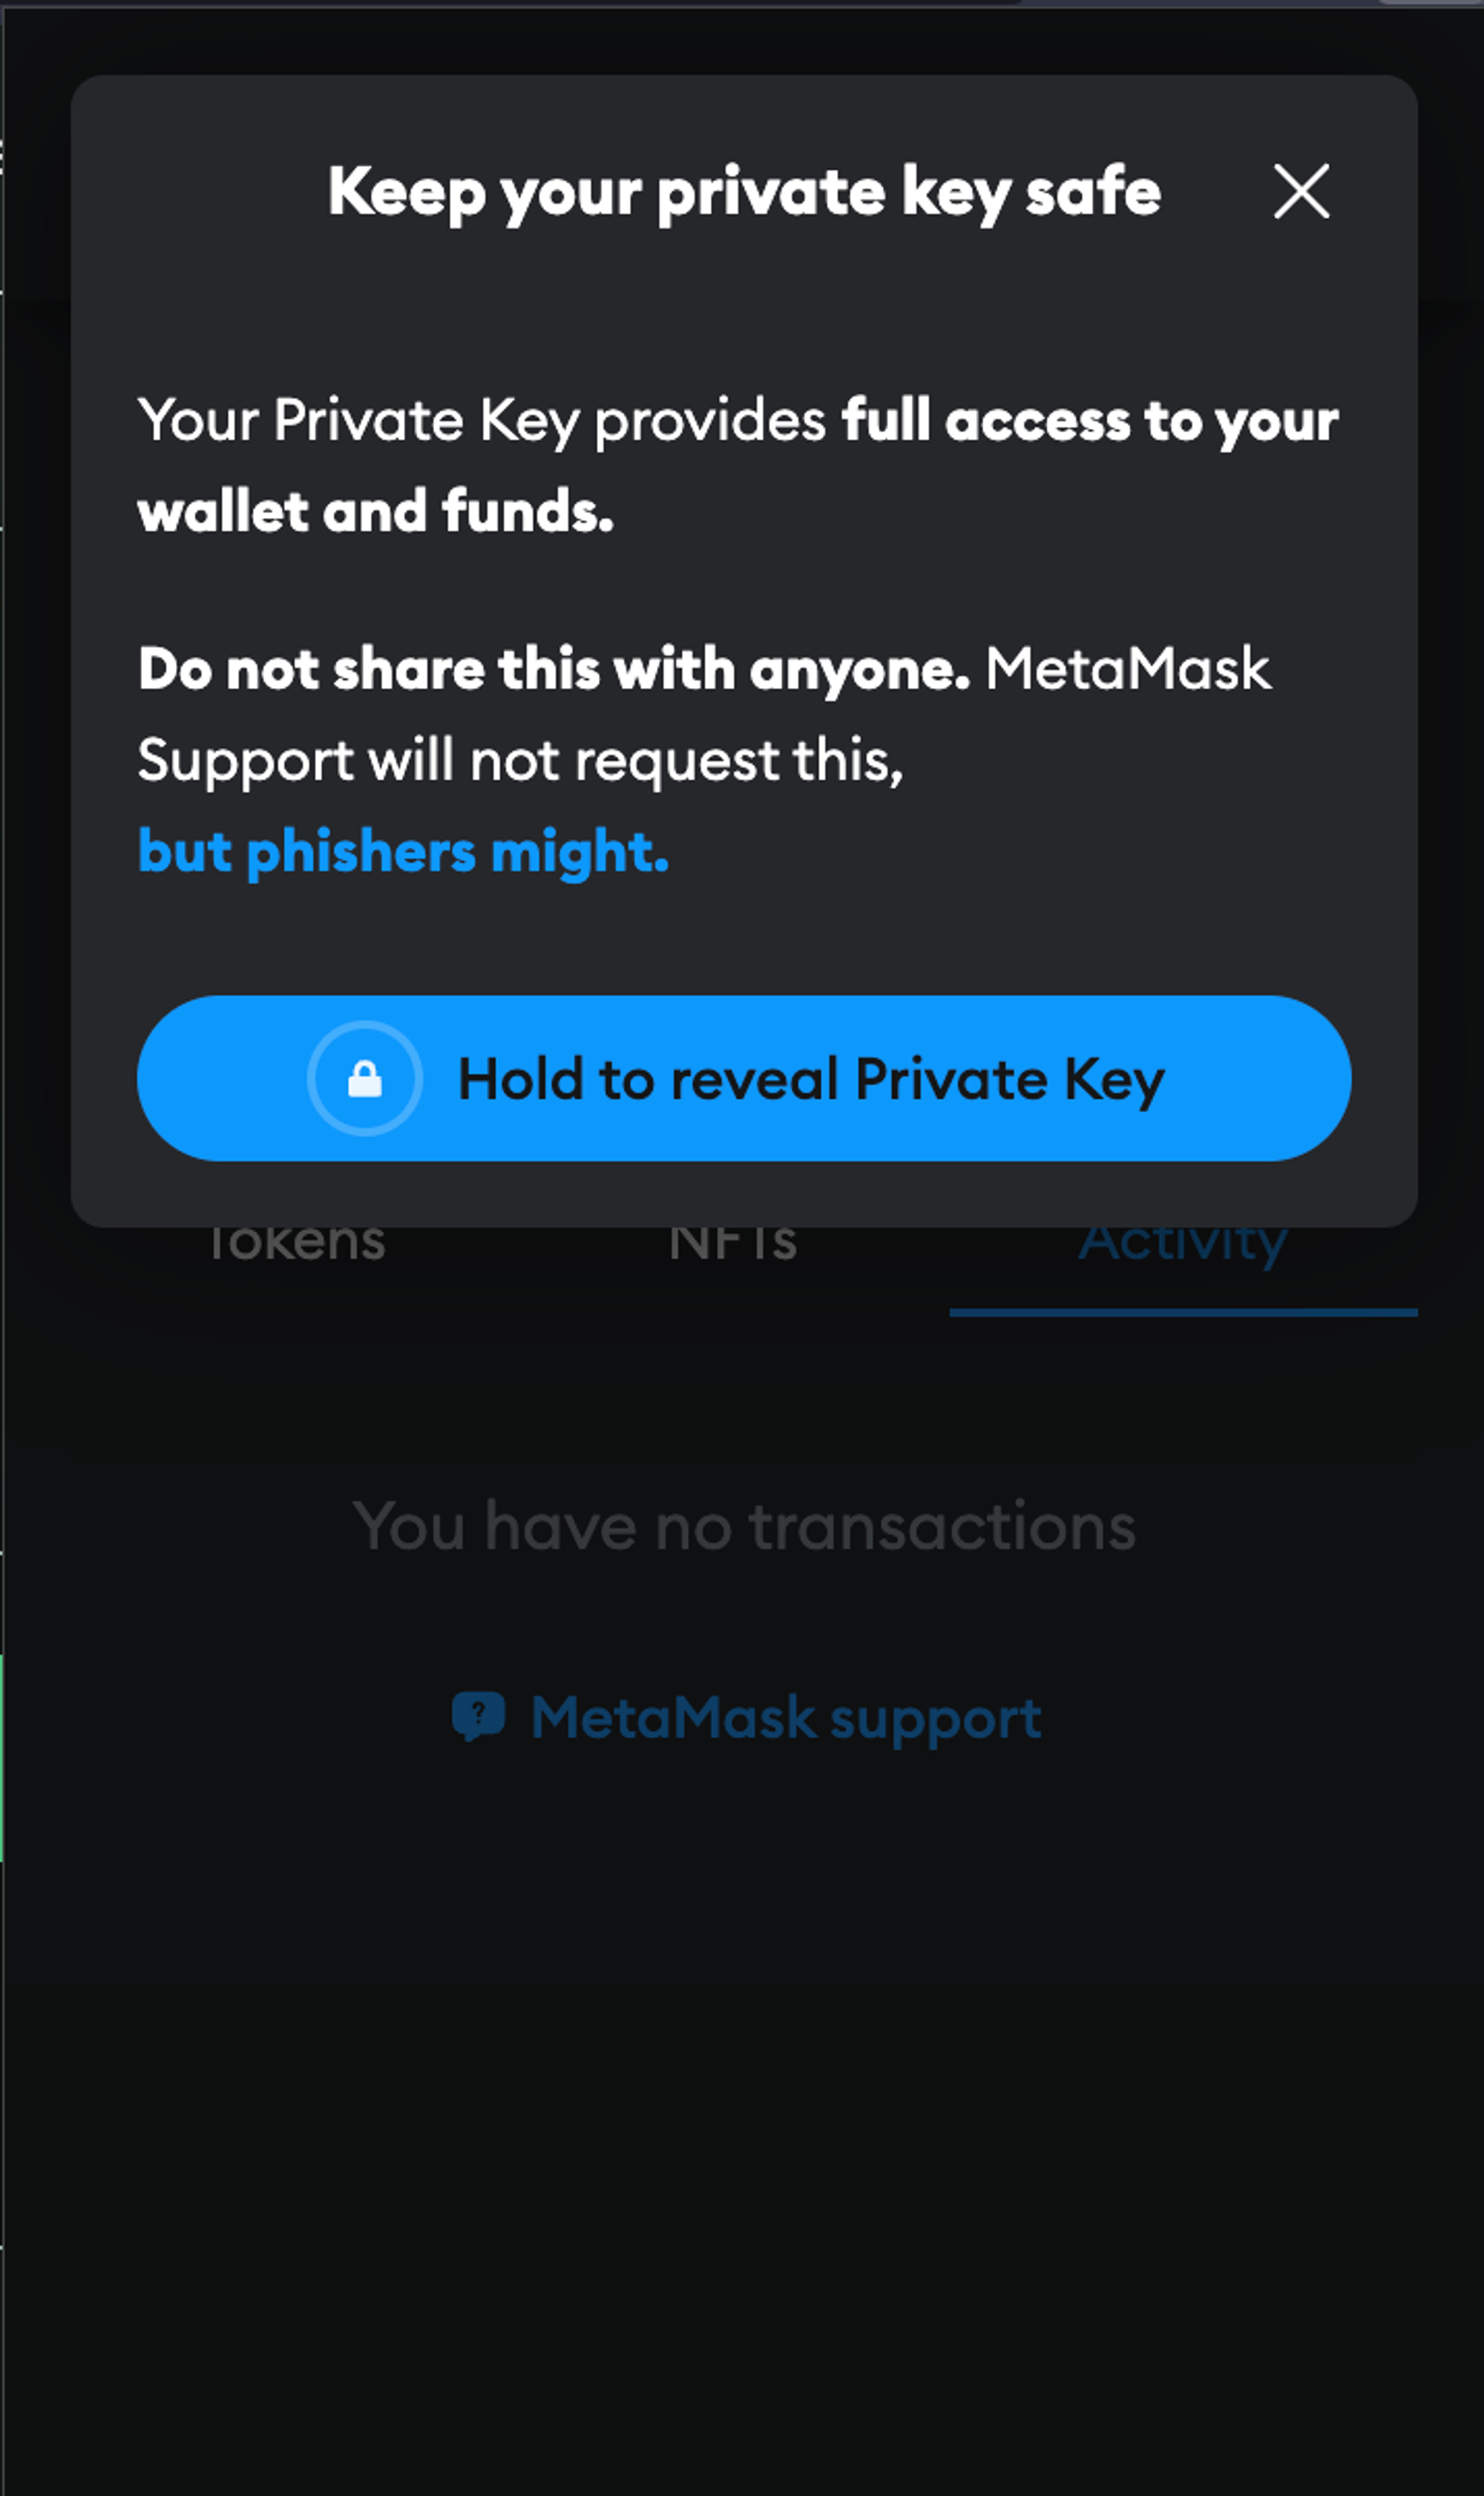
- Click on “Show Private Keys"
To simplify the process, do note that we are using the same wallet to mint the Devnet slot as well as setting up the burner wallet. If you wish to use a different wallet address other than the one used to mint the Devnet slot, feel free to do so by generating a fresh pair using several tools available on the command line as well as online. For eg, https://vanity-eth.tk/
Enter the password, and as you can see, it is telling us to never share private keys with anyone. We have set up a burner wallet so no worries. Now click and hold on “Hold to reveal your Private Key.” Copy it and paste in .env for SIGNER_ACCOUNT_PRIVATE_KEY
- SLOT_ID: This refers to your ID generated when you minted a NFT in Step 2.
- Copy the SLOT_ID from the Devnet Dashboard and paste it in .env for SLOT_ID
- SNAPSHOT_CONFIG_REPO: This refers to the branch we forked above
- Paste this in .env: https://github.com/vijaysaaran/snapshotter-computes
- SNAPSHOTTER_COMPUTE_REPO: This refers to the branch we forked above
- Paste this in .env: https://github.com/vijaysaaran/snapshotter-configs
- PROTOCOL_STATE_CONTRACT: This refers to the contract address corresponding to the data source chain. We are working on Sepolia Testnet.
- Paste this in .env: 0x3a201ee51C24f399E8Eb914A9609BC7Bb79D593B
Optional variables:
- IPFS_URL: The URL for the IPFS (InterPlanetary File System) service in HTTP(s) (e.g., https://ipfs.infura.io:5001) or multiaddr format (e.g., /dns4/ipfs.infura.io/tcp/5001/https).
- IPFS_API_KEY: The API key for the IPFS service (if required).
- IPFS_API_SECRET: The API secret for the IPFS service (if required).
- SLACK_REPORTING_URL: The URL for reporting to Slack.
- Save the .env file
The rest of the variables in the .env file do not need any changes. If you don't have any custom requirements, we are now ready to run the node.
4. Run Snapshotter Node
To run our node:
- Run docker
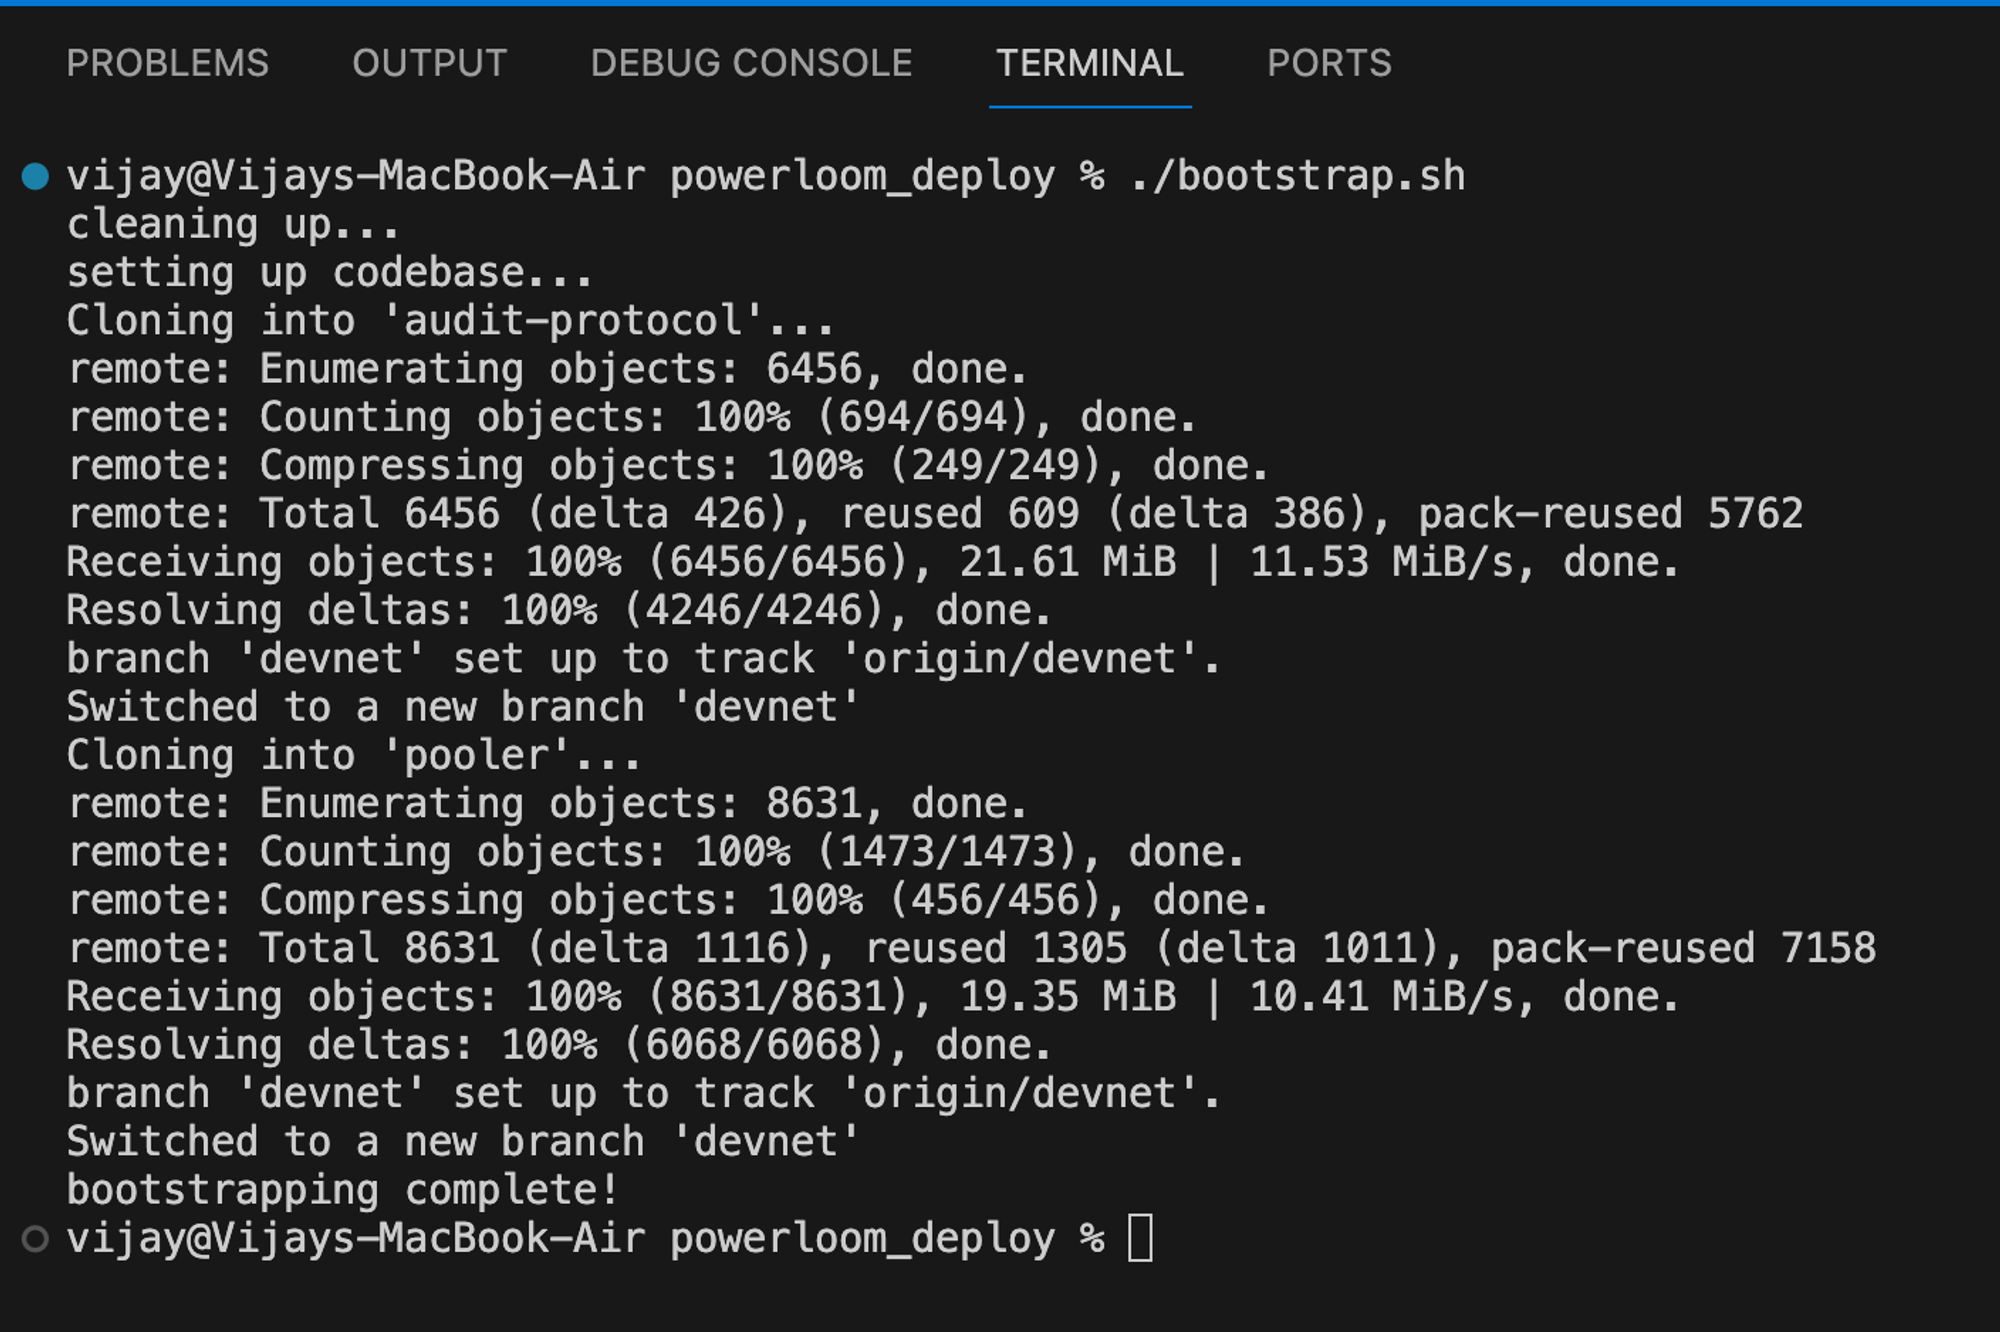
- Setup the codebase: ./bootstrap.sh
- Run the command: ./build.sh
- It will prompt you to assign a burner wallet to your SLOT_ID. This step happens only once. Type “yes”
- Enter your private key to sign a message. This is the private key for the wallet holding your slot NFT, which is used to verify the ownership of that slot.

This may take a few minutes depending on your CPU and network.
- Go back to your Devnet dashboard and click “Check node status” and the Status of your respective SLOT_ID is now Active

We have completed setting up our Snapshotter Node with Powerloom Protocol.
Conclusion
Building apps with Powerloom opens up new ways to read, retrieve, and use data.
In this blog, we understood how to set up a Snapshotter Node in 4 simple steps. Reimagine everything you know about data and build applications with Powerloom Protocol.
About Powerloom: The Composable Data Network for Web3
At the forefront of onchain data protocols, Powerloom serves the evolving needs of smart contract-based applications in sectors like DeFi, GameFi, and NFTs. Our approach incentivizes consensus on state transitions and event emissions, transforming raw data into a structured and easily accessible format. Powerloom is committed to decentralization, offering a lower entry barrier. We make it feasible for more ecosystem participants to contribute to and benefit from the network.